What is the quick answer?
Learn how to make AI explainer videos that hook fast and convert. A practical workflow for scripts, visuals, voiceovers, and edits using Satura AI.
Key takeaways
- The Real Bottleneck Behind AI Explainer Videos
- Why the tab switch is the real tax
- Writing the Script That Earns the First Five Seconds
- Build the script around one outcome
- Use the first sentence like a storefront sign
- Turning the Script Into Scene-by-Scene Visuals
Overview
You open your laptop to make one quick explainer, and the whole thing immediately turns into a small circus. The script is in one tab, the voiceover is in another, the visuals are half-finished in a third, and now you're debating whether the intro makes sense once it's spoken aloud. That's usually where ai explainer videos stop feeling “fast” and start feeling like coordination work with extra steps.
The weird part is that generation itself is no longer the hard part. The hard part is keeping one idea, one script, one visual style, and one export pipeline from drifting apart while you move from rough concept to publishable video. That's the production problem behind attention-heavy formats like Shorts, Reels, TikTok, and YouTube explainers, where the first few seconds do most of the work.
The Real Bottleneck Behind AI Explainer Videos
The first hour of a typical explainer project is rarely glamorous. You tweak a hook in one place, copy it into a voice tool, notice the pacing feels off, jump back to the script, then realize the visuals no longer fit the revised line. By the time the first draft exists, the creator has already made three quiet compromises, and each one chips away at clarity.
That's why the bottleneck in 2026 isn't rendering speed, it's alignment. Multiple 2026 guides recommend keeping AI explainer videos in the 60-90 second range, and several stress that the core message needs to land in the first 3-5 seconds or at least within 10 seconds because the format is so tight on attention. The workflow has to support that constraint from the start, not patch it later. You can see the same logic in chain AI models for video from Armox Labs, which treats the job as a sequence of connected outputs instead of a single magic button.
Why the tab switch is the real tax
Every extra handoff creates friction. A script that sounded fine on the page can turn stiff once it's voiced, and a visual style that looked clean in the concept stage can feel inconsistent once you start mixing scenes from different sources. That's why a single browser workspace matters so much. It keeps the story in one place while you make decisions, instead of forcing you to reconstruct intent after each export.
A practical way to think about it is simple. If the idea changes, the script should change. If the script changes, the visuals should change. If the visuals change, the voice and edit should still feel like the same video. That's the coordination cost most tools hide until you're already deep into production.
Practical rule: the faster a tool generates scenes, the more important it becomes to control inputs, style, and sequence from one place.
A workflow-oriented setup also reduces the “tool bounce” that kills momentum. If you're comparing options for that kind of setup, the internal overview of AI video creation tools is useful as a map of the field, especially if you're trying to decide whether you need a generator, an editor, or both. The point isn't to collect more software. It's to keep the story coherent from the first prompt to the final export.
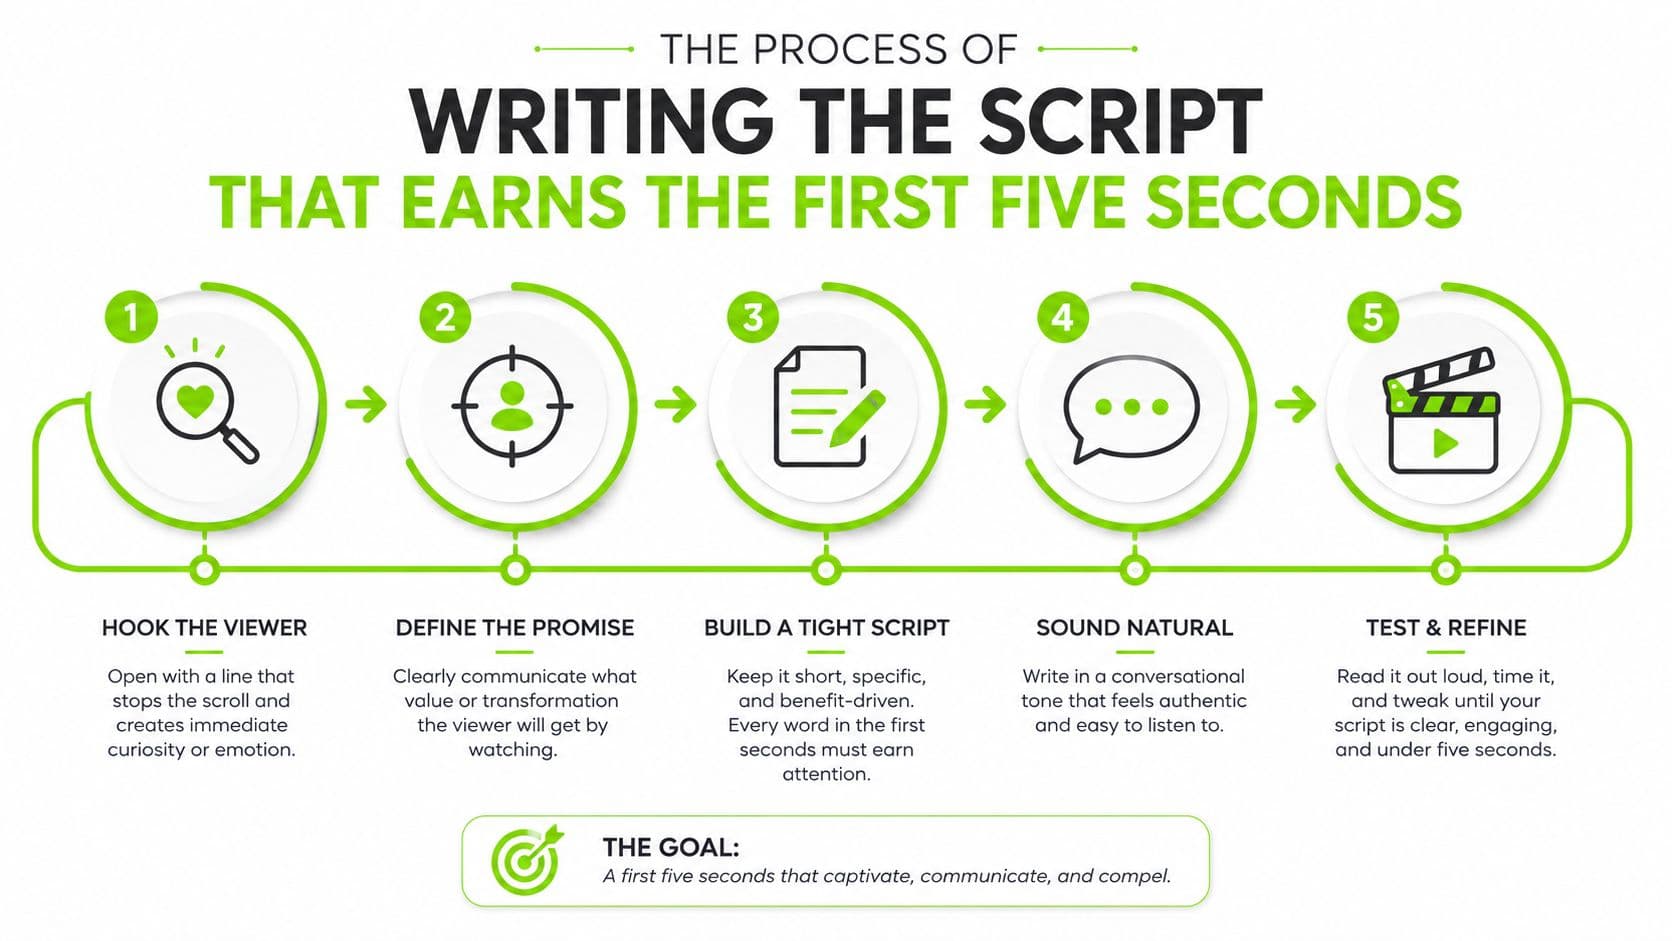
Writing the Script That Earns the First Five Seconds
A strong explainer script isn't a pile of features. It's a compact narrative with a clear job, and the best versions usually follow a simple arc. One 2026 guide recommends a Hook, Problem, Solution, How It Works, and CTA, with the hook at 12-15 words, the problem and solution each at 35-45 words, the how-it-works section at 35-40 words, and the CTA at 10-15 words. That same structure fits a 150-180 word script for a 60-second video at standard pacing. Imagine.art's explainer framework is one of the clearest versions of that model.
Build the script around one outcome
The script gets easier the moment you stop trying to explain everything. Pick one viewer outcome, then write as if the viewer only needs that single answer. If the video is about a product, the script should move from frustration to relief. If it's about a workflow, the script should move from confusion to a cleaner process. One problem, one solution, one next step. That focus is what keeps a short video from turning into a messy demo reel.
A useful writing pattern is to draft the lines as if each one will become a separate visual. The 2026 production guidance from Digen's explainer workflow recommends parenthetical visual directions and about 150 words per 60 seconds of voiceover, which is a good working pace for short-form explainers. If a line can't be pictured, it usually needs rewriting.
Read the script out loud before you touch the visuals. If a line sounds awkward in your mouth, it'll sound worse in the final voiceover.
Use the first sentence like a storefront sign
The opening has one job, get the viewer to keep watching. Another 2026 guide recommends putting the core message in the first 3-5 seconds, and that matters because the audience doesn't owe you time. Colossyan's explainer video guide also pushes the same short-form logic, with a strong preference for one problem and one solution per video.
That's where a library of proven hooks helps. A good creative reference bank gives you shape before you write, which is useful when the blank page is the thing slowing you down. The best scripts don't feel “creative” in the abstract. They feel clean, direct, and easy to follow.
For a practical hook-building example, this YouTube hook generator is a handy reference point if you're trying to turn a flat opening into something sharper without bloating the whole script.
Turning the Script Into Scene-by-Scene Visuals
Once the script is locked, the next failure point is visual coherence. A lot of creators assume the AI will “figure out” the right shots, then they wonder why the result feels random, mismatched, or oddly repetitive. The fix is boring, but it works. Write explicit visual directions in parentheses next to each line so the model knows whether you want a close-up, cutaway, infographic plate, or screen recording.
Lock the visual language before generation
Pick one style and stay inside it. Cartoon, collage, soft 3D, and simple animation all work, but mixing them inside a single short video usually makes the whole piece feel less intentional. The value of a locked style isn't just aesthetic. It reduces decision fatigue because every new scene has a built-in boundary.
The same applies to scene structure. A scene-by-scene build is faster when each line corresponds to one visual unit. That keeps the edit clean and prevents the “too many ideas per frame” problem that makes explainers hard to follow. A practical production workflow from this 2D explainer automation guide also leans on modular assembly, which is exactly what short-form work rewards.
Reuse on purpose, not by accident
The smartest channels don't invent a new visual system for every upload. They reuse a small library of avatars, motion patterns, and asset types so the audience learns the format quickly. That doesn't mean the videos become generic. It means the viewer spends less time decoding the style and more time absorbing the point.
Creative discipline matters more than visual novelty. If every video looks different, the channel keeps resetting itself.
A good rule is to limit yourself to two or three visual templates per channel. That gives you enough flexibility to avoid monotony, but not so much variety that production slows down. The result is a channel with recognizable rhythm, quicker assembly, and fewer revisions when the next script lands.
Recording AI Voiceovers Without Sounding Like a Robot
Voiceover is where people decide whether the video feels credible or synthetic. The script may be tight, the visuals may be polished, and the pacing may be correct, but a stiff narration can still flatten the whole thing. That's why the best workflow starts with the ear test, not the render button. A 2026 guide from Kling's explainer workflow recommends 120-150 words per minute, using the first 10 seconds for the hook, and reading the script aloud to catch robotic phrasing before generation.
Choose the tone that matches the job
Not every explainer should sound the same. A conversational voice works well when the goal is approachability, especially for product walkthroughs or creator-facing content. A more authoritative tone fits better when the video needs to teach, clarify, or reassure. The mistake is picking a dramatic voice just because it sounds polished in isolation.
Consistency matters across a series too. If every upload has a different voice, the channel loses sonic identity. The viewer may not consciously notice the drift, but they feel it. That's one reason polished short-form channels keep narration style stable even when the topic changes.
Mix for speech first, music second
Music should support the voice, not compete with it. A useful production benchmark from Digen's workflow guidance is to keep background music around 20% of the voiceover level so speech stays intelligible. That sounds simple, but it's one of the fastest ways to avoid a muddy final cut.
Captions do more than improve accessibility. They lock comprehension when the video is watched on mute, which is a common reality for short-form platforms. The cleanest workflow is to generate narration, check the mix, then add subtitles while the pacing is still easy to adjust.
If the line sounds fine on paper but clunky in your mouth, rewrite it before voice generation. The model will only make awkward phrasing sound more expensive.
For creators who want the prompt side of the workflow to stay tight, this guide for better video results is worth keeping nearby because the quality of the narration usually tracks the quality of the input brief.
What are the common questions?
What is the short answer for How to Make AI Explainer Videos That Actually Convert?
Learn how to make AI explainer videos that hook fast and convert. A practical workflow for scripts, visuals, voiceovers, and edits using Satura AI.
What should creators do first?
Reading the Numbers After the Video Goes Live
Who is this guide for?
This guide is for YouTube creators, faceless channel operators, agencies, and teams using AI tools to improve video production and growth.
Action checklist
Apply this to your channel today.
- 1Reading the Numbers After the Video Goes Live
- 2Read the opening before you blame the ending
- 3Turn weak metrics into concrete revisions
- 4Common Mistakes and the One-Session Workflow Checklist
- 5The fast fixes that actually matter