
What is the quick answer?
Learn what a color correction tool does, how scopes and wheels work, and how creators get consistent, platform-ready color fast — without destroying skin tones.
Key takeaways
- What a Color Correction Tool Actually Does for Your Videos
- What it actually does
- How Color Correction Became Software
- From lab work to digital pipelines
- The Core Tools Inside Every Color Correction Panel
- Scopes are the measuring tape
Overview
A color correction tool restores accurate, consistent, platform-ready color across shots, lighting setups, and exports using scopes, color wheels, white balance, and selective fixes. If your footage looks orange indoors, green under LEDs, or flat after export, the tool's job is to make the image feel like the same scene everywhere it appears.
You've probably seen this happen already. One clip from your phone looks fine in the camera roll, then it lands next to another shot and suddenly skin tones drift, the background goes muddy, and the whole edit feels stitched together instead of intentional. That's exactly where a real color correction workflow earns its keep, because the goal isn't a prettier picture, it's a believable one.
What a Color Correction Tool Actually Does for Your Videos
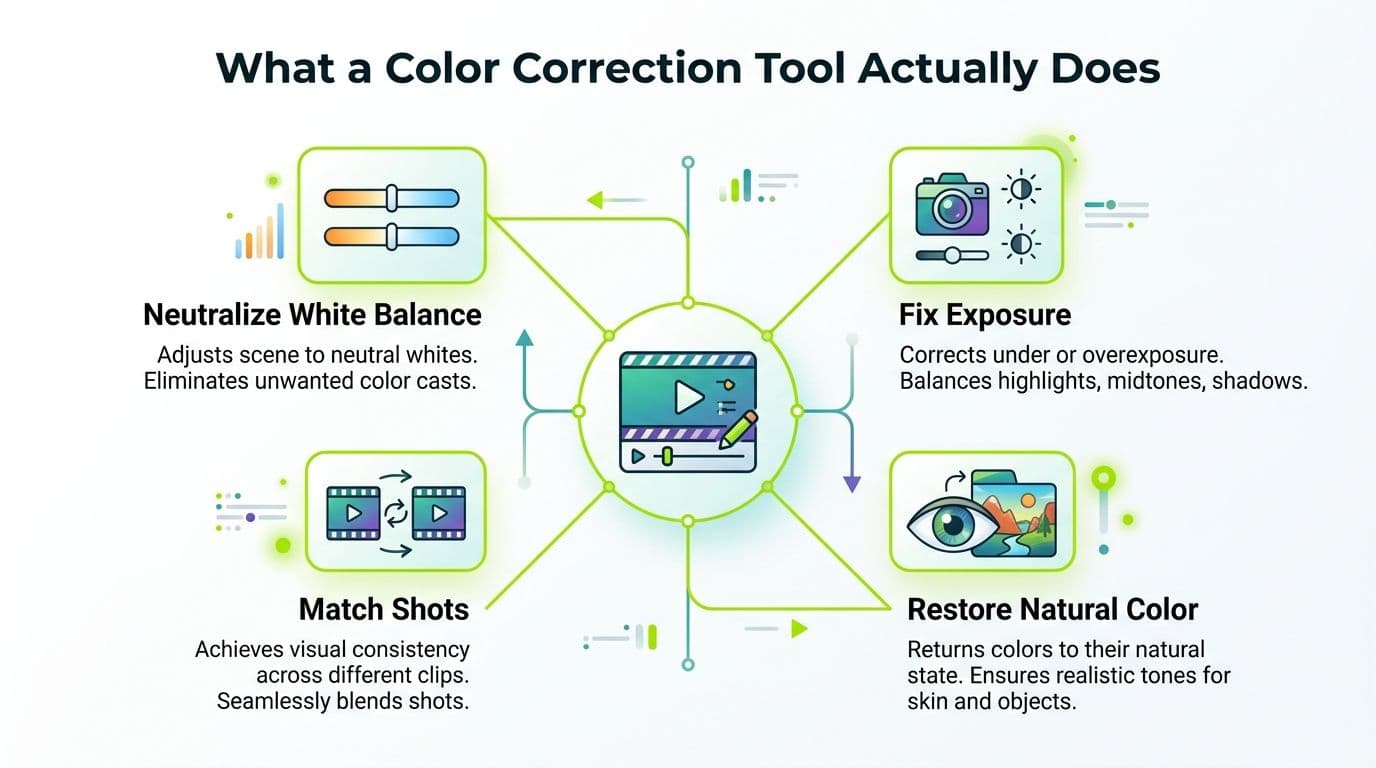
You don't need a fancy film set to need correction. A bedroom shot lit by a window, a desk lamp, and a laptop screen can easily split the frame into warm skin, cool shadows, and a background that feels like a different video entirely. A color correction tool gives you the controls to fix that mess before it turns into a distracting final export.
What it actually does
At the simplest level, the tool helps you neutralize, balance, match, and protect the image. Neutralize means removing unwanted color casts. Balance means making exposure and contrast feel even. Match means getting multiple shots to look like they belong together. Protect means keeping skin tones and brand colors from getting wrecked while you adjust the rest.
That's why the control panel matters so much. White balance handles color temperature and tint. Scopes show you what the image is doing instead of what you think it's doing. Color wheels help reshape shadows, midtones, and highlights. Selective fixes let you correct a face, a wall, or a product without changing the entire frame.
A useful way to think about it is this, a color correction tool is the video version of a measuring tape, a level, and a paint tester all in one. It doesn't just “make footage pretty,” it tells you what needs to be fixed and where. For creators editing editing for TikTok and YouTube, that difference matters because short clips need to look clean fast, even when they come from mixed sources.
Practical rule: If the footage looks wrong before you touch a style look, it probably needs correction, not a filter.
Inside a browser-based editor like Satura's video effects editor, the same logic applies. The software might feel lighter than a traditional suite, but the workflow is the same, fix the image first, then decide how far you want to stylize it.
How Color Correction Became Software
Color correction didn't start as a creator-friendly slider panel. Its roots go back to early color imaging, where the basic idea was to capture color in a controlled way and reproduce it consistently. James Clerk Maxwell's three-color method in 1861 established the additive principle behind modern color work, and cinema followed with commercially viable color processes such as the Autochrome in 1907, Technicolor's functional three-strip process in 1932, and Kodak's Kodachrome in 1935, which became available in the U.S. in 1936. Those milestones matter because they made color reproducible enough to control instead of just hope for. Timeline of photography technology
From lab work to digital pipelines
The shift came later, when film scanning and digital intermediates turned correction into a software process. Industry history sources note that Kodak's Cineon system in the 1990s introduced the digital intermediate idea, which let productions scan footage, adjust it digitally, and then record it back out. By around 2010, “almost all big movies” were using digital intermediates, which tells you how thoroughly software had replaced chemical finishing in major film production. Digital intermediate history and workflow context
That shift changed more than the tools. It changed the location of the work. Instead of happening in a lab at the end of the pipeline, color correction moved into post-production software where editors, colorists, and creators could make decisions shot by shot. That's why today's browser editors, desktop NLEs, and high-end grading systems all look strangely similar once you open the color page. They inherit the same problem, making a camera image behave predictably across devices, delivery formats, and viewing conditions.
A modern tool isn't “just for YouTube.” It sits in the same family tree as the controls used in broadcast and cinema, only simplified for faster delivery.
That's also why the browser-based creator workflow feels so familiar once you've learned the basics. The names are newer, but the logic is old, exposure, balance, matching, and control.
Scopes are the measuring tape
Scopes are the part most creators skip, then regret. A waveform shows luma, an RGB parade separates the red, green, and blue channels, and a vectorscope helps you see how far the image leans toward a given hue. In plain English, scopes tell you what the shot is doing even when your eyes are tired or your monitor isn't trustworthy.
That matters because the image on screen can lie. A bright monitor makes footage look darker than it is. A warm display makes skin seem more orange than the file really is. Scopes don't care about room lighting or your mood, they show signal. That's why they're the first stop when something feels off.
Color wheels move parts of the image
The common primary controls, Lift, Gamma, and Gain, are like tilt knobs for the frame. Lift handles the shadows, Gamma influences midtones, and Gain lifts the highlights. A university VFX lecture describes Gamma as the control that primarily affects the midtones, which is why faces often change there before they change anywhere else. VFX color correction lecture
If the shot is too dark, you don't just drag everything up and flatten it. You decide whether the shadows need help, the mids need shaping, or the highlights are clipping. That's the craft. A broad exposure move and a targeted tonal move are not the same thing, even if they both make the image brighter.
| Tool | What It Actually Does | When to Reach for It |
|---|---|---|
| Scopes | Shows exposure and color distribution numerically and visually | Before any correction, and anytime your eyes disagree with the frame |
| Color Wheels | Adjusts shadows, midtones, and highlights separately | When the image needs tonal shaping without wrecking the whole shot |
| White Balance | Removes unwanted warm or cool casts | When indoor footage looks orange, green, or mismatched across shots |
| LUTs | Applies a predefined transform or look | After the image is already neutral, not as a fix for bad footage |
White balance removes the cast
White balance is the reset button for temperature and tint. If a wall that should look white comes out yellow or green, the whole frame inherits that mistake. Correcting white balance doesn't make the image stylish, it makes the image believable, which is why it belongs early in the stack.
LUTs are shortcuts, not rescue tools
LUTs are often treated like magic. They're really look translations, useful when the footage is already stable. If you use one too early, you're baking a style on top of a problem, and the problem usually gets louder. For a creator workflow, this Premiere Pro tutorial is useful because it shows how familiar correction concepts carry into a typical editing timeline.
Useful memory hook: fix the signal first, then pick the look.
Color Correction vs Color Grading
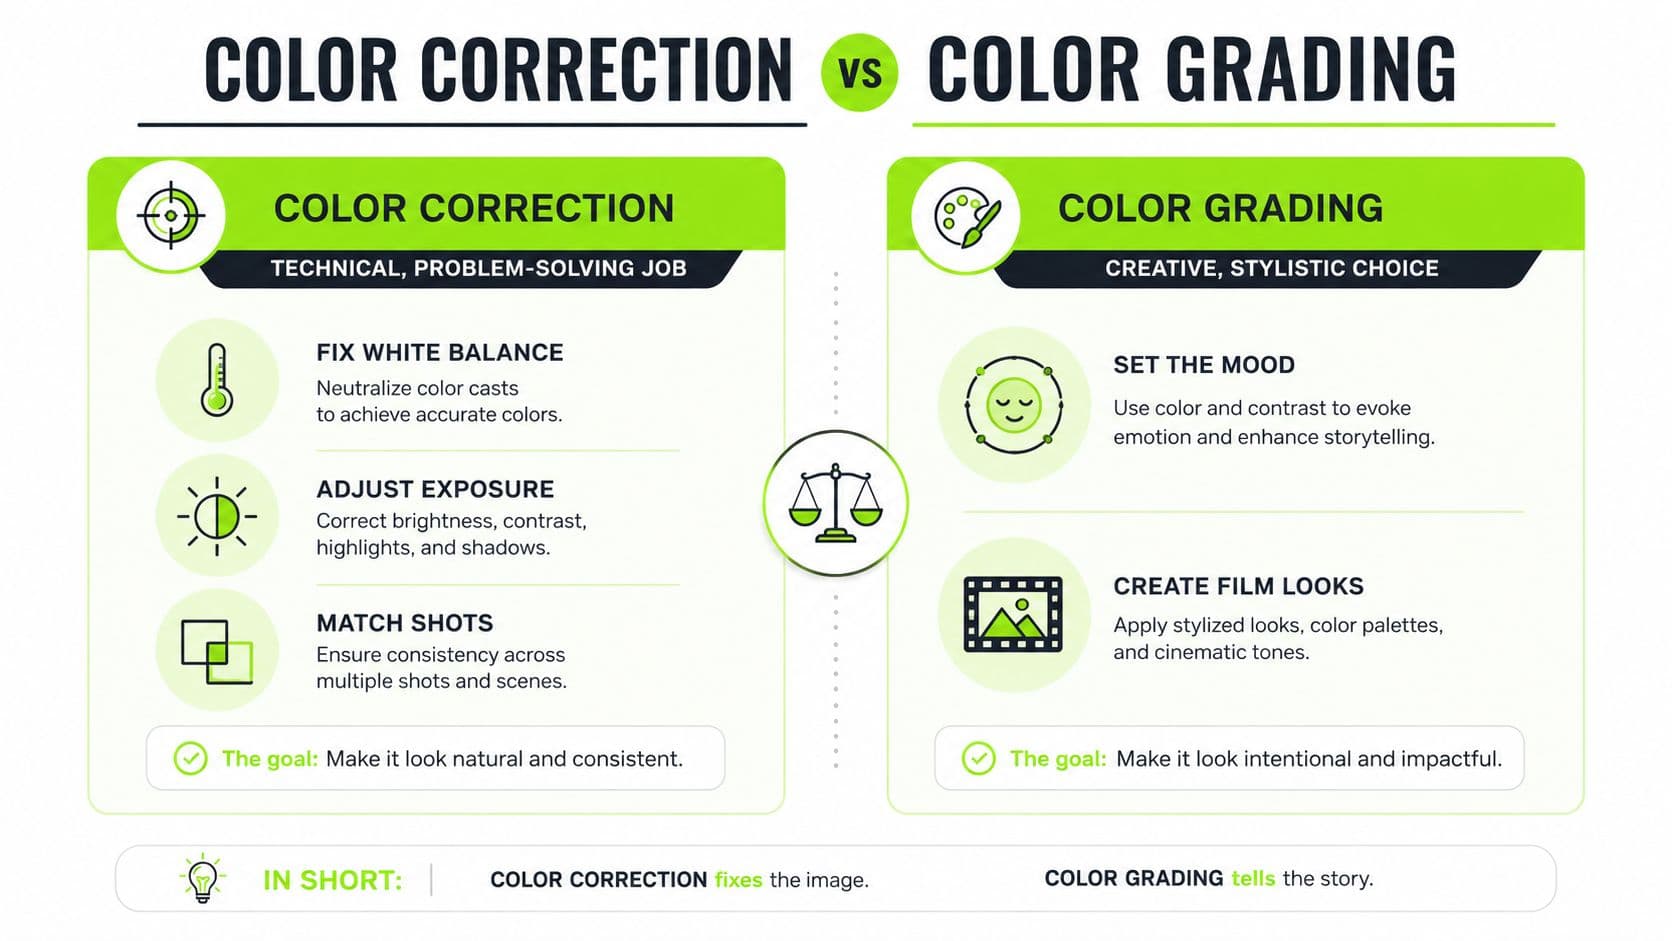
Creators mix these two up because both happen in the same panel. The difference is simple once you stop treating them like synonyms. Correction makes the footage true. Grading makes it expressive.
Correction fixes the problem
If one clip is too green, correction handles it. If the shot is too dim, correction handles it. If two cameras disagree, correction is what gets them talking to each other. The job is technical, not decorative. You're trying to remove obstacles so the viewer sees the subject, not the lighting mistake.
Grading creates the mood
Grading happens after the image is already under control. That's where you push warmth for a nostalgic feel, cool down a sequence for tension, or lean into a brand look that people recognize in a scroll. The creative decision only works when the base image is stable, because style can't hide broken exposure for long.
A lot of creators skip straight to the vibe step. That's usually when skin goes weird, shadows collapse, or every clip in the sequence starts looking like it came from a different channel. The fix is boring but reliable, correct first, grade second.
This matters especially for portraits. If the face is the focal point, a bad grade is hard to ignore because viewers lock onto skin tone before they notice the background. Why color correction matters for portraits is a helpful read if you want to see how small tonal shifts can change how polished a face appears on screen.
If a filter has to rescue white balance or exposure, it's doing correction work badly.
What are the common questions?
What is the short answer for Color Correction Tool Guide for Video Creators?
Learn what a color correction tool does, how scopes and wheels work, and how creators get consistent, platform-ready color fast — without destroying skin tones.
What should creators do first?
Calibration, File Handling, and Export Settings
Who is this guide for?
This guide is for YouTube creators, faceless channel operators, agencies, and teams using AI tools to improve video production and growth.
Action checklist
Apply this to your channel today.
- 1Calibration, File Handling, and Export Settings
- 2Match the display to the delivery target
- 3Handle the file like it matters
- 4Use test patterns when the image feels off
- 5Your Next Move with a Color Correction Tool
Sources & methodology
- Satura editorial guide based on the source video, topic cluster, and article sections.
- Source video reviewed for this article: https://www.outrank.so/