What is the quick answer?
Learn how to speed up music in GarageBand on Mac and iOS with simple steps, Flex Time tips, and pitch-preserving tricks creators actually use.
Key takeaways
- When Speeding Up Music Actually Solves the Problem
- Changing Project Tempo on Mac with Flex Time
- The desktop sequence that works reliably
- Speeding Up Tracks on iPhone and iPad
- What the phone workflow does differently
- Speeding Up Only Part of a Song
Overview
You're trying to make a track breathe faster, not butcher it. Maybe the song is too long for a Reel, the intro music is stepping on a voiceover, or one loop needs more energy without dragging the rest of the session with it. In GarageBand, that usually comes down to three decisions, change the project tempo, stretch the audio with Flex Time, or speed up only a specific region so the rest of the arrangement stays put.
When Speeding Up Music Actually Solves the Problem
The need usually shows up in a very ordinary moment. A creator has a 2:40 song that needs to sit under a 30-second Reel, a podcast editor realizes the intro overhangs the host's first line, or a montage feels sleepy because the cut points and the beat don't land together. That's why people end up searching how to speed up music in GarageBand, because they're really solving timing, not remixing for fun.
A useful shortcut is to separate the problem into three scenarios. First, you want the entire project faster, which is the cleanest use of project tempo. Second, you want one passage to speed up while the rest stays unchanged, which is where the Tempo Track matters. Third, you want a clip or loop to fit a visual cue, where the quickest fix may be a region-based adjustment rather than a full arrangement change.
If you're choosing music for a montage, the timing problem often starts before the edit does. A track that feels right on its own can still miss the cut once clips start stacking, which is why resources like accelerate tracks using Flex Time are helpful when you need the audio to stay musical as the pace changes. For a broader content-planning mindset, it also helps to think about the final edit as a pacing problem, not just a music problem, which is the same reason a montage track has to support the cut rhythm in songs for montage.
Practical rule: if the music has to stay in sync with a voice or picture, don't start by dragging the tempo blindly. Decide whether you need the whole song faster, only part of it faster, or just a shorter clip.
Changing Project Tempo on Mac with Flex Time
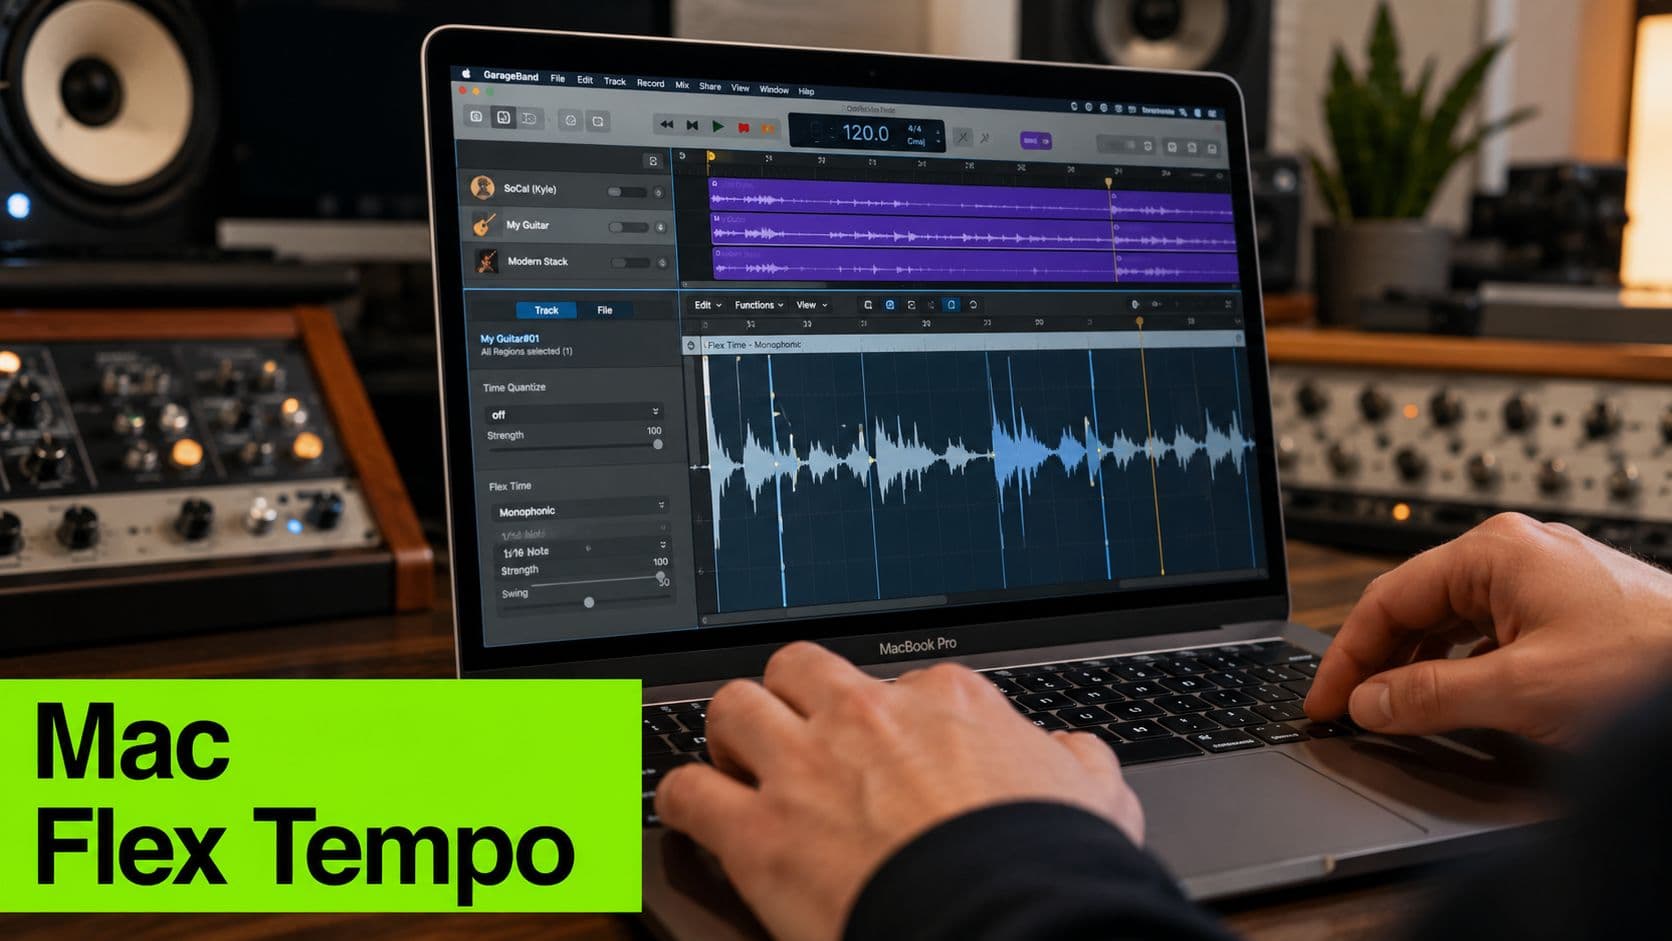
If you need the whole song faster on Mac, start with Flex Time first, then raise the BPM. GarageBand has to read the audio region before it can stretch the timing cleanly, otherwise you end up forcing playback speed without giving the track any room to follow. That order keeps the edit usable when you're matching a voiceover, shortening a full track for a reel, or tightening a loop without wrecking the rest of the project.
The desktop sequence that works reliably
Select the actual audio track first, not just the region. Open the Track or Region settings, then turn Flex on for that track. Let GarageBand finish analyzing the audio before you touch the tempo, because those markers tell the app how to stretch the file instead of just rushing through it. Once the analysis is done, raise the project BPM in the tempo display, either by typing a higher value or dragging the control upward.
That sequence matters more than people think. If the BPM changes before the track is analyzed, GarageBand can leave the clip sounding half-updated, or make it drift against the rest of the session. You'll hear it fast if the drums stay tight but the vocal lands late, or if the file gets faster without feeling locked to the grid.
A cleaner way to test the setting is to move one step at a time. Turn Flex on, confirm the region follows tempo, then raise the BPM in small jumps so you can hear where the sound starts to break up. On a dense mix, a little speed-up can stay musical, while a heavy stretch on a full vocal can start sounding thin or slightly chipmunky.
Practical rule: if the first pass sounds off, check three things, the right track is selected, Flex is enabled, and the region is set to Follow Tempo.
That avoids the most common desktop mistake, clicking the wrong header and wondering why nothing changed. It also keeps you from blaming the tempo control when the actual problem is that the audio never got analyzed in the first place.
If you come from another editor, the decision process matters as much as the button clicks. A tutorial for Premiere Pro can help with the general editing mindset, especially if you're used to timing cuts around music, but GarageBand still needs its own setup before the track will follow the new speed.
Speeding Up Tracks on iPhone and iPad
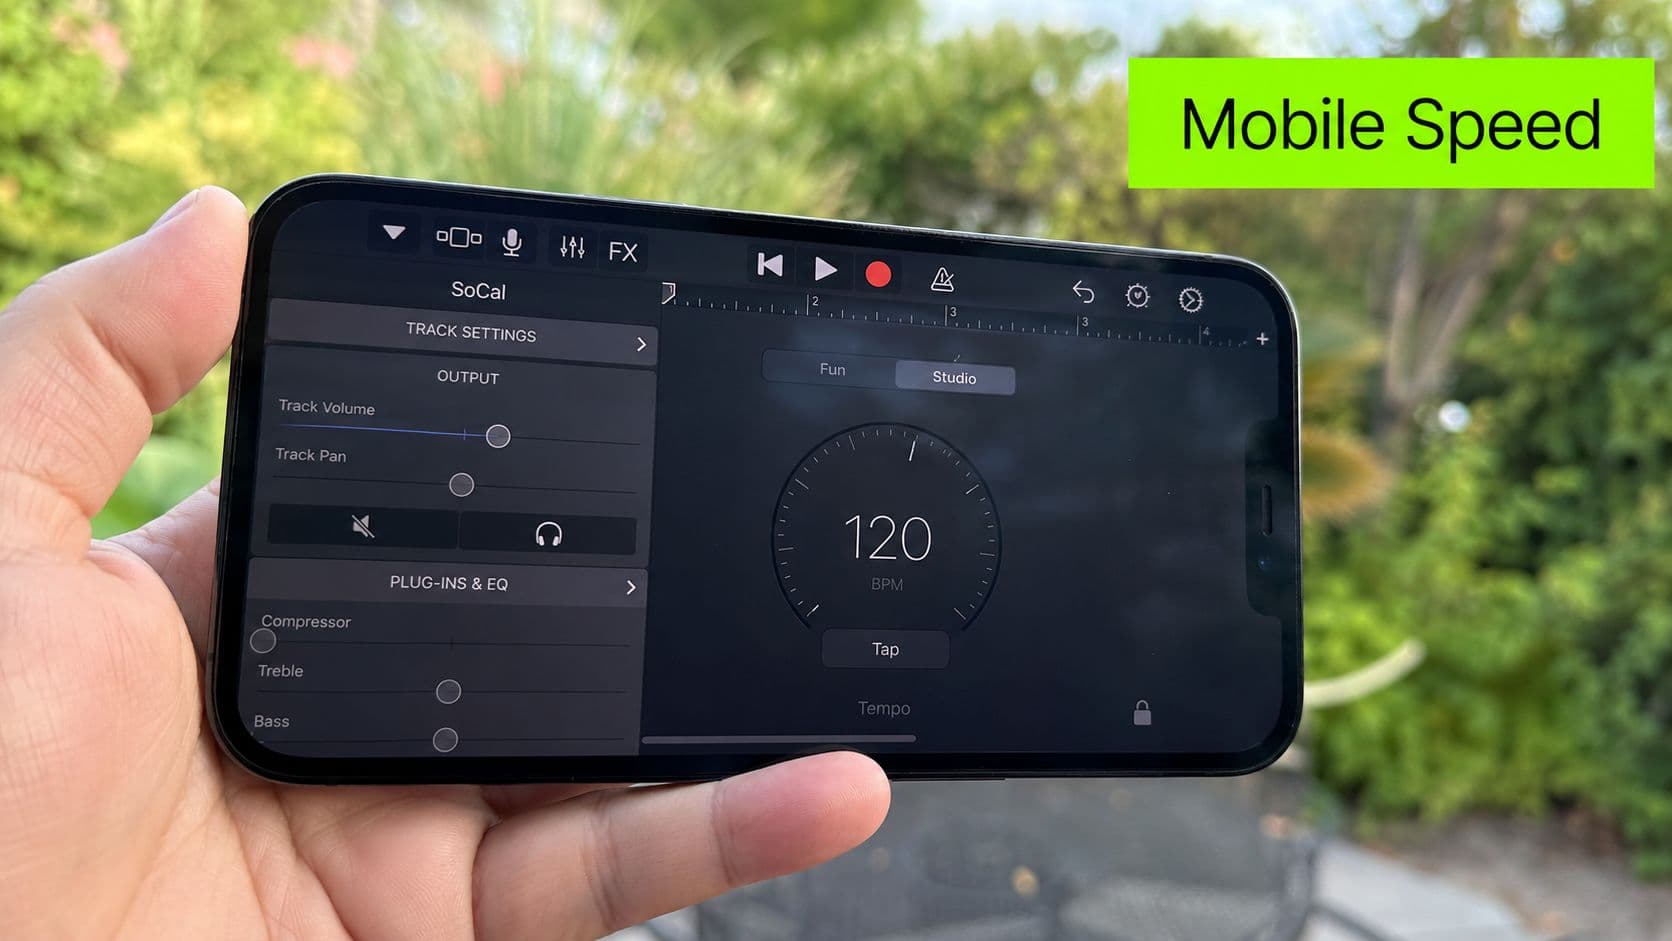
The mobile version is more touch-driven, and that changes the feel of the job. Open the project, tap the track, then open Track Settings and choose Tempo from the gear menu. From there, drag the BPM slider to the right to speed the music up, and watch the displayed tempo update as you move it.
What the phone workflow does differently
On iPhone and iPad, the same screen also lets you enter or adjust a tempo directly, which is handy when you're matching a cut point or syncing to a reference beat. The interface is quicker for small timing jobs because you can nudge the speed with your thumb instead of hunting through desktop panels. If you need a mobile recording companion for a fast workflow, you can also download the iOS recording app and keep the whole edit loop on the phone.
The main trap is using Region Length when you really meant tempo. Region length shortens the clip, but it doesn't preserve musical phrasing the way tempo editing does, so it's better for simple loop work than for full songs. Another mobile quirk is that the slider can feel more granular than precise, so typing the BPM is often better when you need a tight match.
If you're editing for Shorts or social clips, the phone workflow is usually enough to get the pace right without ever opening the desktop app. That said, if the song has layered parts or live audio, tempo changes still need the same care as on Mac, because speeding up the playback doesn't magically protect the musical phrasing.
For creators comparing apps across the short-form workflow, it helps to think in terms of edit speed and pacing control, which is why a guide like YouTube Shorts editing apps can sit alongside GarageBand in the larger process.
Speeding Up Only Part of a Song
Most tutorials stop at global BPM changes, but that's not enough when only one section needs to move. If your intro music has to get out of the way before a voiceover starts, or if the chorus needs more lift without changing the verse, GarageBand gives you a few ways to handle it. The best one depends on how much of the session you want to protect.
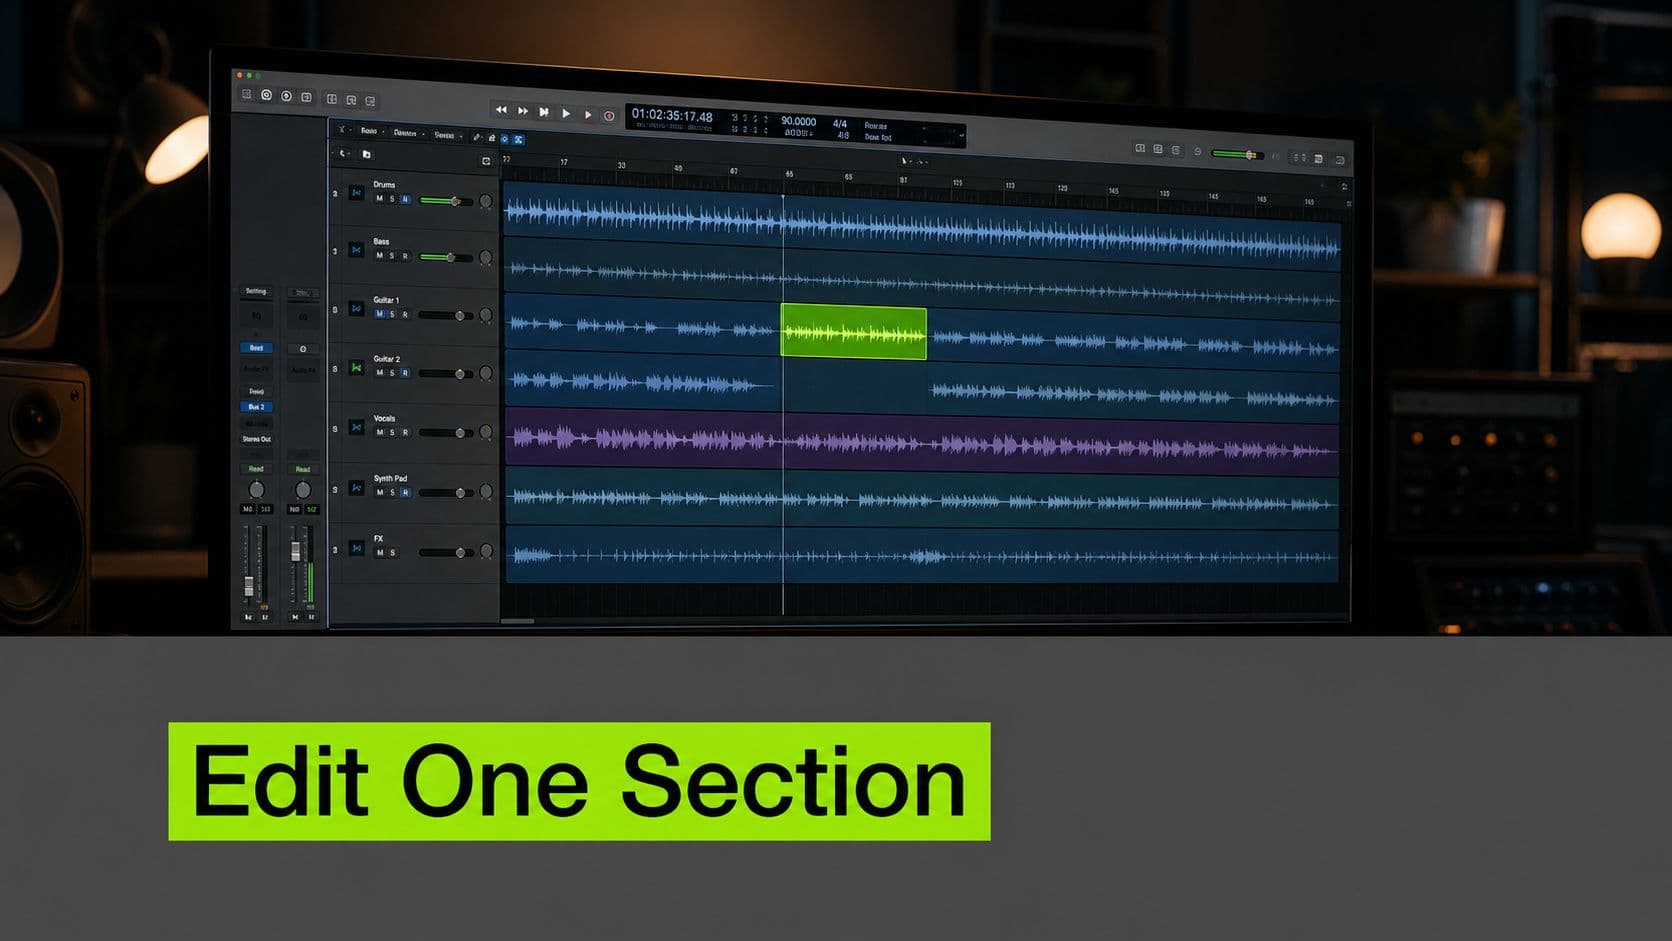
Three ways to avoid speeding up the whole project
Follow Tempo and Pitch is the cleanest choice when one recorded region needs to behave differently from the rest of the song. That approach is especially useful when the music sits under narration or dialogue, because you can keep the session tempo stable and let a single region adapt.
The Tempo Track is better when the song itself has a shape, like an intro that should stay relaxed and a chorus that should push forward. Add tempo points at the start and end of the section, then drag the line upward so only that passage speeds up. That gives you section-specific control without forcing the rest of the project to match.
The manual export and reimport approach is the fallback for more complicated material. It's useful when the project already has a lot of edits, loops, or layered parts and you want to “freeze” a sped-up piece before bringing it back in. That can be the cleanest workaround when the arrangement is already crowded.
Tempo jumps can sound abrupt if Flex isn't enabled consistently across clips. If one region follows tempo and another doesn't, you'll hear the seam.
For loop-based material, the Tempo Track and export workaround usually make more sense than trying to brute-force the whole project. For voiceover-driven edits, per-region control keeps the bed music from stepping on the words. And if the song has verse-to-chorus movement, a few tempo points are often cleaner than one global speed increase.
The same logic carries into more polished video workflows, where pacing has to line up with visual intention. If the edit itself is the main challenge, a resource like how to make professional videos can help frame the bigger pacing choice beyond the music file alone.
Pitch, Quality, and the Chipmunk Problem
Speed and pitch are tied together unless you tell GarageBand not to let them move together. If Follow Tempo is off, speeding up a region pushes the pitch up too, which is the classic chipmunk sound. That can be a creative effect if you want an obvious stylized shift, but it's usually not what you want for a clean edit.
When to preserve pitch, and when not to
If Follow Tempo and Pitch is on, GarageBand tries to keep the pitch stable while the audio stretches in time. That sounds more natural for vocals, acoustic parts, and any track where the listener would notice tonal drift right away. The trade-off is that time-stretching can introduce small artifacts, especially when the material is dense or the performance has a lot of reverb and layered detail.
The artifacts are much easier to hide on simple material. Drums, sparse loops, and many EDM leads tolerate tempo changes better because the ear is already tracking rhythm more than sustained harmonic detail. Complex vocal stacks, low-quality source files, and roomy mixes are the ones that expose stretching problems fastest.
This is why export quality still matters even when the edit inside GarageBand is non-destructive. You're not ruining the file just by changing tempo, but the result you hear depends on what went in, how clean the region is, and whether the pitch is meant to move with the speed or stay fixed. If you've ever wondered why one sped-up track sounds polished and another sounds brittle, that difference usually starts with the source, not the tempo slider.
For a related cleanup issue, especially when stretching a vocal bed under narration, it's worth understanding how timing changes interact with space and overlap, which is why a guide like remove audio echo can be a useful companion when the mix starts getting mushy.
Exporting the Sped-Up File the Right Way
Making the project faster in GarageBand is only half the job. If you export the wrong thing, the speed change won't travel with the file outside the app, or you'll end up sharing a project file instead of a finished audio track. The export step is where the tempo change gets baked in for real.
Mac and iOS export basics
On Mac, use Share and then Export Song to Disk. Pick a format that fits your goal. AIFF or WAV makes sense when you want lossless audio, while AAC is better when size matters more than archival quality. Before exporting, double-check that the project is still sitting at the faster tempo you want, because it's easy to undo the BPM change without noticing.
On iPhone and iPad, tap the project, hit the share icon, and choose the export quality preset. The same basic warning applies there, if the project has slipped back to its original tempo, the exported audio will too. What you want is a rendered file, not a GarageBand project file that just preserves the session settings and flex markers for later editing.
If you're choosing between file types for distribution, the right answer depends on where the track is going next. A compact export is useful for sending drafts, while a lossless file is better when you want to keep the stretched audio as clean as possible. For a broader look at format trade-offs, WAV vs MP3 vs FLAC is a practical reference when you're deciding how much quality to preserve.
What are the common questions?
What is the short answer for How to Speed Up Music in GarageBand Without Ruining It?
Learn how to speed up music in GarageBand on Mac and iOS with simple steps, Flex Time tips, and pitch-preserving tricks creators actually use.
What should creators do first?
When to preserve pitch, and when not to
Who is this guide for?
This guide is for YouTube creators, faceless channel operators, agencies, and teams using AI tools to improve video production and growth.
Action checklist
Apply this to your channel today.
- 1When to preserve pitch, and when not to
- 2Exporting the Sped-Up File the Right Way
- 3Mac and iOS export basics
- 4Real Creator Use Cases and Quick Wins
- 5Which fix fits which job