
What is the quick answer?
Tired of echo ruining your audio? Learn how to diagnose, fix, and remove audio echo using simple room tweaks, software, and AI tools for crystal-clear sound.
Key takeaways
- The Echo That Kills Your Watch Time
- What creators usually get wrong
- Finding the Culprit and Quick Physical Fixes
- Why your room is doing this
- Fast fixes you can do today
- Software Workflows for Pesky Reverb
Overview
You hit record, delivered your best take, and felt good about it. The pacing was right, your hook was sharp, and you could already picture the comments rolling in.
Then you played it back. Your voice sounded like it was bouncing around a kitchen, hallway, or empty office. Suddenly the whole video felt cheaper than it looked.
That's why echo matters more than most creators think. Viewers will forgive a lot. They won't forgive audio that feels distant, hollow, or tiring to listen to. If you're serious about retention, you need to treat echo as a watch-time problem, not just an audio problem. And if you want to diagnose where weak retention is coming from, tools like Retention Lab can help connect production issues to performance patterns.
The Echo That Kills Your Watch Time
A creator can spend hours fixing captions, trimming pauses, and polishing visuals, then lose the whole thing because the voice sounds like it was recorded three feet away from the mic in a bare room. That happens all the time. The content itself may be solid, but echo tells the viewer something else. It says low effort, low trust, low polish.
That reaction is brutal because it happens fast. Nobody announces it. They just stop listening. On YouTube, Shorts, TikTok, and Reels, that kind of friction hurts the first impression that keeps people from swiping away.
Poor audio doesn't just sound bad. It makes the viewer work harder.
Echo is especially damaging because it smears consonants and softens the edges of speech. Your words are still there, but they arrive with a blurry halo around them. The brain has to decode more. That extra effort lowers patience, and patience is the currency every creator is spending.
There's also a psychological hit. A clean voice feels close and intentional. An echoey voice feels far away. Even if your camera looks great, the sound can make the whole video feel amateur.
What creators usually get wrong
A common approach is to jump straight into effects and try to remove audio echo after the fact. Sometimes that works. Sometimes it saves a video. But if you don't figure out whether the problem is your room, your mic position, or your processing chain, you end up stacking fixes that fight each other.
A better workflow starts with diagnosis. Listen for where the echo shows up most:
If your audio sounds like a bathroom, don't panic. This is fixable. But the fastest wins usually happen before you touch a plugin.
- Between phrases: That usually points to reverb tails hanging after your voice stops.
- On sharp consonants: That often means reflections are hitting hard surfaces near the mic.
- Across the whole recording: That can mean the room itself is too reflective.
Finding the Culprit and Quick Physical Fixes
Echo is just sound bouncing. Your voice leaves your mouth, hits a wall, desk, window, floor, or ceiling, then comes back into the microphone a split second later. In a treated room, those reflections get absorbed. In a typical home setup, they ricochet around and stack on top of the direct voice.
That's why physical fixes beat clever editing so often. The reflection never gets recorded in the first place.

Why your room is doing this
Hard, flat surfaces are the usual offenders. Bare walls, windows, laminate floors, empty corners, and desks all throw your voice back at the mic. If your room sounds “live” when you clap, your recordings probably will too.
One of the most reliable fixes is simple: add soft absorption around the recording area. According to this room-treatment demonstration, adding blankets, sound panels, pillows, or a duvet around the recording space helps minimize echo by absorbing sound waves before they reflect off walls.
Practical rule: Treat the space around the microphone first, not the whole room at once.
That matters because your mic only hears what reaches it. A blanket behind the camera may help a little. A thick duvet close to the reflective wall beside your mic often helps more.
Fast fixes you can do today
You don't need to build a vocal booth tonight. Start with whatever absorbs sound and is already in your place.
Here's the simplest test. Record the same line in three spots: your normal desk setup, near a closet full of clothes, and with a blanket setup around the mic. Pick the take that sounds closest and driest before processing.
If you make videos regularly, it's worth tightening the whole capture chain. A practical next step is learning the broader production habits in this guide to making professional videos, because echo almost never exists alone. It usually comes packaged with inconsistent framing, weak lighting, and rushed setup choices.
- Record near clothes, not empty walls: A walk-in closet full of hanging fabric is often better than a stylish office with bare surfaces.
- Kill the desk reflection: Put a folded towel, blanket, or soft desk mat under the mic area if you're recording at a hard tabletop.
- Build a pillow zone: Stack pillows or cushions to the sides of your mic position. It looks silly. It works.
- Hang a duvet behind you or beside you: Thick fabric close to the sound path can tame a lot of slap and ring.
- Move away from corners and glass: Corners can exaggerate buildup, and windows are reflection machines.
Software Workflows for Pesky Reverb
Sometimes you do everything right on set and the room still fights you. The take is usable, the delivery is good, but the voice has that smeared, distant sound that makes viewers click away faster than they realize. Software can rescue a lot of that. It just helps to know which tool fixes which symptom.
The three tools that matter most are parametric EQ, noise gates, and DeReverb. Each one solves a different part of the problem. Each one can also make speech sound worse if you push it too hard.
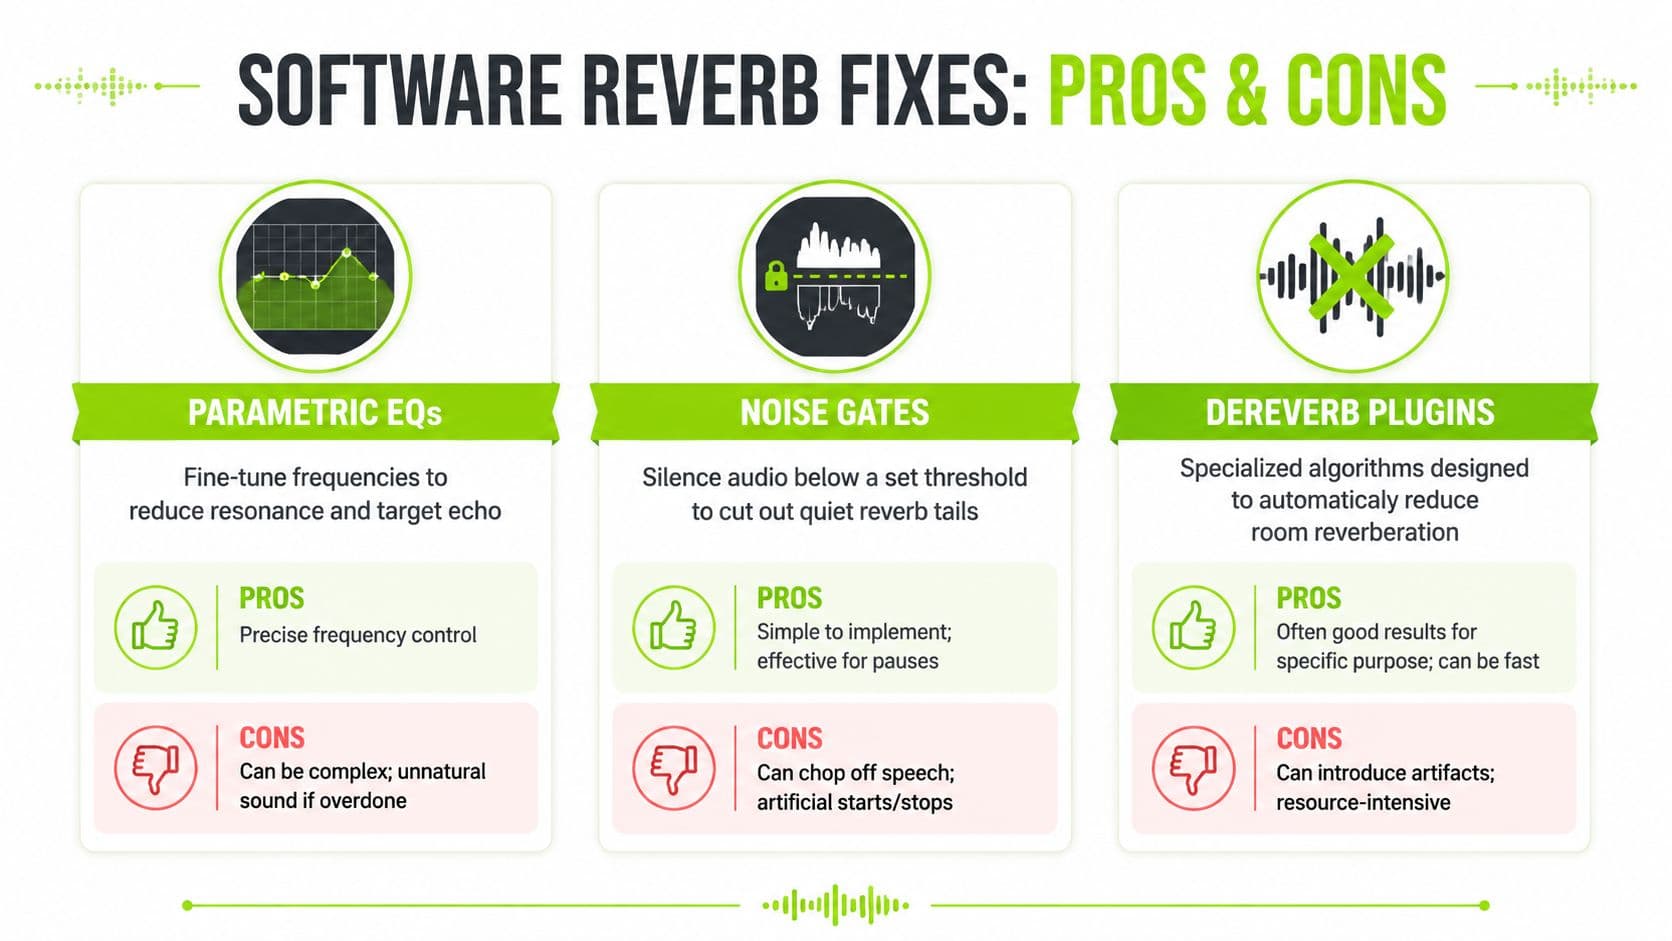
Parametric EQ for targeted cleanup
EQ is the first tool I reach for when the room tone is living inside the voice itself. Echo often shows up as boxiness, nasal buildup, or a harsh ring in the midrange. Isolate Audio's echo-removal method lays out a practical approach: sweep with a narrow EQ band, find the ugly resonance, then cut only the frequencies that are causing trouble.
The workflow is simple:
That last part matters. Creators often keep cutting because the soloed voice sounds cleaner with every move. Then they play the full edit and the voice has no weight left. EQ is good at taming ring. It is bad at rebuilding a voice you hollowed out.
If the voice starts sounding small, the room problem may be lower than before, but viewer trust drops with it.
- Use a narrow bell band and boost it.
- Sweep across the mids until the room ring jumps out.
- Turn that boost into a cut.
- Keep the cut modest and listen in context.
- Repeat only if another resonance is obvious.
Noise gates for cleaner pauses
A noise gate helps with the echo tail between phrases. It does not clean the reflected sound inside the words themselves. That distinction saves a lot of wasted tweaking.
Set the threshold high enough and the pauses feel tighter. Set it too high and consonants disappear, breath sounds get clipped, and the whole delivery feels cheap. A better approach is to lower the threshold until the ends of words stay natural, then adjust attack and release so the gate opens and closes smoothly.
Use a gate when the room bloom is bothering you in the gaps between sentences. Skip it as the main fix if the voice sounds washed out all the way through.
A quick decision table keeps the trade-offs clear:
| Tool | Best for | Risk |
|---|---|---|
| Parametric EQ | Ringy midrange reflections | Hollow voice if overcut |
| Noise Gate | Reverb tails between phrases | Chopped word endings |
| DeReverb | Overall room sound | Artifacts or robotic texture |
If you're cleaning multiple problems in one edit, the order matters. Voice should usually be the priority. Then handle competing elements like music or ambient clutter. This breakdown of using AI to remove video background music is useful if your dialogue is fighting both reverb and background audio at the same time.
DeReverb when you need a faster rescue
DeReverb is the blunt instrument. It can save a clip that EQ and gating only partly improve, especially when the whole recording feels like it was made three feet farther from the mic than it was.
Adobe Premiere Pro includes a built-in DeReverb effect under Noise Reduction/Restoration. Boris FX's Premiere Pro walkthrough recommends starting conservatively on the Amount control. That is the right instinct. Small moves usually sound more believable. Push too far and the voice turns papery, dull, or synthetic.
If Premiere is your main editor, this Premiere Pro tutorial library for editing and cleanup workflows is a useful companion because audio fixes work better when the rest of the edit is tight too.
For harder cases, dedicated restoration tools can go further. In iZotope RX 10, many editors start stronger with the DeReverb module, then pull back once artifacts show up, as demonstrated in this RX 10 workflow demo. In Premiere, another practical move is adding Vocal Enhancer after DeReverb, as shown in this practical Premiere cleanup workflow. That can put some body back into a voice that got thinned out during cleanup.
The trade-off stays the same across every manual method. More correction usually means more artifacts. The best workflow is the one that gets the voice clear enough that viewers stop noticing the room and keep watching.
The One-Click Fix with AI Speech Enhancement
You finish editing a solid video, upload it, then hear the playback on your phone speakers. The voice is clearer than before, but the room is still hanging around the words. Viewers may not call it “reverb,” but they feel it fast. It makes the video sound less trustworthy, less intentional, and easier to skip.
That is why AI speech enhancement has become a practical shortcut for creators on a schedule. Instead of building a cleanup chain by hand, you feed the recording into a model trained to pull speech forward and push room sound back. The goal is not perfection. The goal is getting clean, watchable dialogue before audio problems start costing retention.

Why AI is replacing hand-tuned cleanup
AI works best on the part creators care about. Speed with acceptable quality. If the choice is spending 25 minutes tweaking de-reverb for a five-minute video or getting a solid result in one pass, high-volume creators usually pick the one-pass option.
It also handles messy real-world audio better than many beginners expect. Echo rarely shows up alone. A typical creator track has reflections, inconsistent mic distance, background hum, and level jumps from line to line. Manual tools can clean that up, but every extra plugin adds another chance to thin out the voice or create weird artifacts.
I still would not call AI magic. On badly recorded audio, it can leave a watery edge on consonants or make breaths sound strange. But for YouTube videos, courses, podcasts, and shorts where turnaround matters, a good enhancer often gets you to “clear enough to keep watching” much faster than a manual chain.
The best cleanup tool isn't the one with the most controls. It's the one you'll actually use before publishing.
What are the common questions?
What is the short answer for How to Remove Audio Echo from Your Videos?
Tired of echo ruining your audio? Learn how to diagnose, fix, and remove audio echo using simple room tweaks, software, and AI tools for crystal-clear sound.
What should creators do first?
Repeat only if another resonance is obvious.
Who is this guide for?
This guide is for YouTube creators, faceless channel operators, agencies, and teams using AI tools to improve video production and growth.
Action checklist
Apply this to your channel today.
- 1Repeat only if another resonance is obvious.
- 2Add absorption where reflections start: Side walls near the mic position matter a lot.
- 3Treat corners if the room feels boomy: Bass traps help low-end buildup that makes recordings feel muddy.
- 4Use soft furnishings on purpose: Rugs, curtains, couches, and bookshelves all help break up reflective energy.
- 5Record in the same place each time: Consistency makes editing and mixing easier.