What is the quick answer?
Master any cut paste photo app with pro techniques for clean edges, AI background removal, and social-ready exports. Build faster, repeatable workflows today.
Key takeaways
- Why Most Cut and Paste Edits Look Fake
- The problem usually starts at the edge
- The Core Workflow for Clean Composites
- Start with the cutout, then distrust it
- Place the subject before you polish the scene
- Resolution Matching and Blending Modes That Matter
Overview
You're racing a thumbnail deadline, the subject cutout is almost good, and the background looks perfect until you zoom in and see a weird halo around the hair. That's the point where many users blame the app, but the core issue is usually a mix of segmentation limits, resolution mismatch, and skipped cleanup. A cut paste photo app can move fast, but clean composites still depend on knowing where the automation ends and the human eye has to take over.
Why Most Cut and Paste Edits Look Fake
A YouTuber with ten minutes before upload doesn't need a lecture on compositing theory. They need a clean face cutout, a background that doesn't scream “template,” and a thumbnail that still reads on a phone screen. That's exactly where cut and paste edits get exposed, because the eye catches inconsistencies faster than the app can smooth them out.

The problem usually starts at the edge
Auto-cutout is useful, but it rarely nails every strand of hair, transparent sleeve, or overlapping boundary. App guidance for cut-paste editors keeps coming back to the same point: AI auto-cutout plus manual refinement is the essential workflow because automatic segmentation misses fine detail, especially around hair and semi-transparent areas. That's why a subject can look technically “cut out” and still feel pasted on.
Practical rule: if the edge looks sharp in a way real camera footage wouldn't, the composite probably needs cleanup.
Lighting mismatch is the next giveaway. If the foreground is shot in soft light and the background is bright and contrasty, the subject floats. The same thing happens when the subject's shadow direction disagrees with the scene, or when the scale makes the person look too large for the environment. I've built enough thumbnails to know that viewers may not be able to explain what feels off, but they'll absolutely feel it.
There's also a gap between what app listings promise and what users get. The category has moved toward background eraser and precision editing claims, but the hard parts still show up in hair, glass, smoke, shadows, and perspective. The promise is speed, but that speed only works when you know what to inspect before export. For composition choices that keep thumbnails feeling balanced, the principles behind the golden spiral in photography still help more than any flashy one-tap effect.
The Core Workflow for Clean Composites
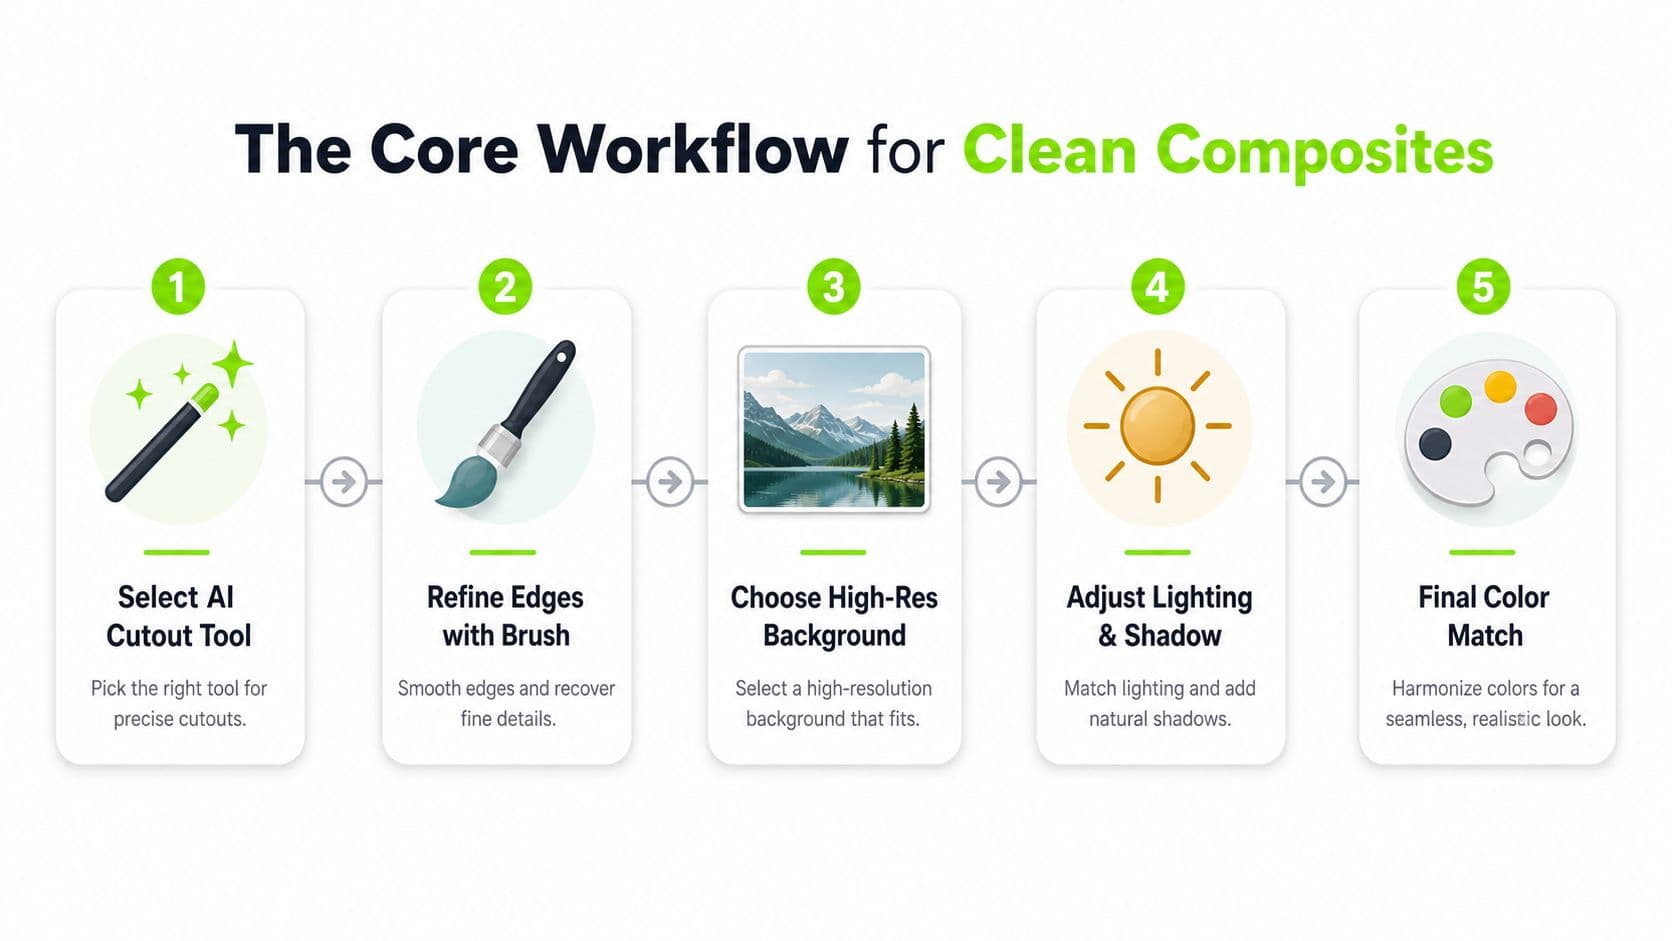
The cleanest results come from a boring, repeatable sequence. First isolate the subject, then clean the edge, then place it on the target background, then fix the visual relationship between both layers. That order matters because every shortcut leaks into the final image somewhere else.
Start with the cutout, then distrust it
AI auto-cutout is a great first pass, not a finish line. Once the subject is isolated, switch to manual lasso and erase tools to trim the edge where the algorithm hesitates. Hair, lace, hands crossing the body, and objects with see-through parts need that second pass if you want the image to survive a close look.
The Japanese App Store listing for Cut & Paste Photos points to the same practical reality, the app advertises 100+ preset canvases, 30+ advanced blending modes, and an eraser tool for cleanup. Those features matter because they support the actual work after extraction, not just the glamorous part before it. The more control you have over the canvas and blend, the less the result feels like a sticker dropped on top of another photo.
Place the subject before you polish the scene
Pasting onto the background sounds simple, but scale and placement can make or break the illusion. A good composite usually needs the subject anchored to a believable horizon, desk line, wall angle, or crop edge. If the subject is too centered or too large, the frame starts behaving like a collage instead of a scene.
After placement, color-match the subject to the background. That doesn't always mean heavy filters, sometimes it's as small as warming the cutout slightly, lowering contrast, or softening saturation so the layers share the same visual temperature. CapCut's guide to cut-and-paste picture apps treats HD export, layer-based editing, and manual lasso and erase tools as core requirements, which matches what holds up in production work. The app is doing the lifting, but the creator is still responsible for making the layers belong to each other.
If you want a fast reference for subject cleanup and edge repair, the background remover workflow is the kind of thing to keep nearby before you start placing images into a new scene.
Resolution Matching and Blending Modes That Matter
Resolution mismatch is one of those problems people notice after they've already posted. A crisp subject pasted onto a soft background, or a background that's much sharper than the foreground, makes the edit feel assembled from different worlds. Independent app guidance says results depend heavily on the resolution and quality of both source and background images, and it explicitly recommends using images with the same resolution when possible (Cut Paste Photo App guidance).
Match the source before you touch the effect controls
A clean cutout starts before the edit begins. If the subject is low resolution, enlarging it inside the app usually reveals jagged edges, blurry hair, and compressed skin texture. If the background is low quality, no amount of blending can hide the fact that the entire frame is soft or blocky.
Use the highest-quality source image you have, then choose a background that matches it in clarity, not just in theme.
That's why mobile tools work best when they're used like precision editors, not novelty apps. The same app guidance notes compatibility floors around iOS 12–13+ or Android 6.0+, which signals these tools are built for consumer devices rather than desktop-grade compositing. For creators, that means the app can move fast, but it does not replace a full retouching stack.
Blend the layers, don't stop at opacity
A lot of users stop at opacity, then wonder why the edit still looks detached. Blending modes change how pixels interact, which is different from making one layer see-through. On iOS, Cut & Paste Photos advertises 30+ advanced blending modes, and that is the feature set that helps a composite move from obvious to believable (Cut & Paste Photos).
Multiply works better when darker pixels need to merge into a scene, screen helps with lighter elements, and overlay can help create more integrated contrast when the lighting already lines up. The exact setting depends on the image pair, but the choice should always be visual, not automatic. If the subject still looks pasted after blending, the issue is usually edge cleanup or resolution, not the blend mode itself.
Stretching is where a lot of composites fall apart, so keep a Photoshop image stretching guide nearby before you scale anything inside the frame. Hair edges, shoulders, and shadow lines are the first places to inspect when the subject and background come from different sources.
The Privacy Gap Most Users Ignore
The biggest blind spot in this category isn't a missing filter. It's the lack of clear answers about what happens to the photos you upload, crop, save, and maybe delete later. Most cut paste photo app listings lead with features and skip the part where users want to know whether their images are processed locally, stored in the cloud, or kept in a gallery they can't really inspect.
That matters more when you're editing client work, family photos, or anything sensitive. The Google Play listing for one cut-and-paste app points to basic support details, but it doesn't fully answer whether uploaded photos, cropped assets, or saved galleries are retained, and that absence is the primary concern (Play listing). If an app stores user-created crops locally or in an in-app gallery, creators should still ask what “delete” means in practice.
The questions worth asking before upload
Before trusting any tool with personal images, I'd look for clear answers to these:
That's why the mainstream narrative around these apps feels too casual. They're often treated like harmless novelty tools, but they're still handling personal images, which deserve the same scrutiny you'd give any other creative workflow. If privacy is part of your buying decision, the Satura AI privacy policy is the kind of document you should expect an app to make easy to find and understand.
- Where is processing happening? On-device processing gives you a different privacy profile than cloud processing, and the app should say so plainly.
- What does deletion remove? If you delete a project, does it disappear from the app only, or from remote storage too?
- Are images reused for training or analytics? If the app doesn't say, that's a gap, not a reassurance.
- Can you use the tool with children's or family photos safely? Privacy-sensitive content deserves an answer that isn't buried in support FAQs.
Export Settings and Fast Workflows for Creators
A creator workflow breaks down fast when every thumbnail or profile image becomes a fresh test. The major time saver is a repeatable export setup, not a flashy effect. Cut paste photo apps that let you save preset canvases, export in HD, and move between devices fit that workflow far better than tools that make you rebuild each asset from zero.
The iOS version of Cut & Paste Photos advertises 100+ preset canvases and the ability to create a custom canvas with your own ratio and resolution. That flexibility matters because thumbnails, profile photos, and vertical story assets all use different shapes, and one canvas size rarely fits all three cleanly.
What are the common questions?
What is the short answer for Cut Paste Photo App Mastery: Create Clean Composites Fast?
Master any cut paste photo app with pro techniques for clean edges, AI background removal, and social-ready exports. Build faster, repeatable workflows today.
What should creators do first?
Can you use the tool with children's or family photos safely? Privacy-sensitive content deserves an answer that isn't buried in support FAQs.
Who is this guide for?
This guide is for YouTube creators, faceless channel operators, agencies, and teams using AI tools to improve video production and growth.
Action checklist
Apply this to your channel today.
- 1Can you use the tool with children's or family photos safely? Privacy-sensitive content deserves an answer that isn't buried in support FAQs.
- 2Choose mobile first if you care most about speed and you are editing while away from a desk.
- 3Choose browser or desktop tools if you need stronger layer control, repeatable templates, or more careful quality checks.
- 4Choose privacy-aware tools if the images are client-owned, sensitive, or likely to be reused across several projects.
- 5Choose tools with manual cleanup if you work with hair, glass, shadows, or overlapping edges.