What is the quick answer?
Learn how to edit YouTube videos with a proven step-by-step workflow covering pacing, retention, audio, AI shortcuts, and repurposing for Shorts.
Key takeaways
- Why Most YouTube Edits Fail Before the Timeline Even Opens
- The core failure mode is poor alignment
- What I check first
- Building the Story Cut Before Anything Else
- Gather, label, then assemble
- Build the story cut before prettifying anything
Overview
Most creators still think how to edit YouTube videos means trimming dead air, adding a few transitions, and exporting cleanly. That's too small a job description. Editing is really a retention-engineering workflow, every cut, pause, punch-in, and audio choice either helps viewers keep watching or gives them a reason to leave.
YouTube already tells you where the truth lives. Audience retention, average view duration, CTR, and watch time show whether the opening matches the thumbnail promise, whether pacing drags, and where viewers bail. Retention is the point-by-point share of viewers still watching, while average view duration measures the minutes watched among viewers who stayed, so editing decisions should be based on those signals instead of gut feel alone. YouTube's own guidance also supports checking analytics after publishing, and creator-education sources recommend reviewing performance within 24 to 48 hours so early problems can be fixed fast (YouTube analytics for editors).
Why Most YouTube Edits Fail Before the Timeline Even Opens
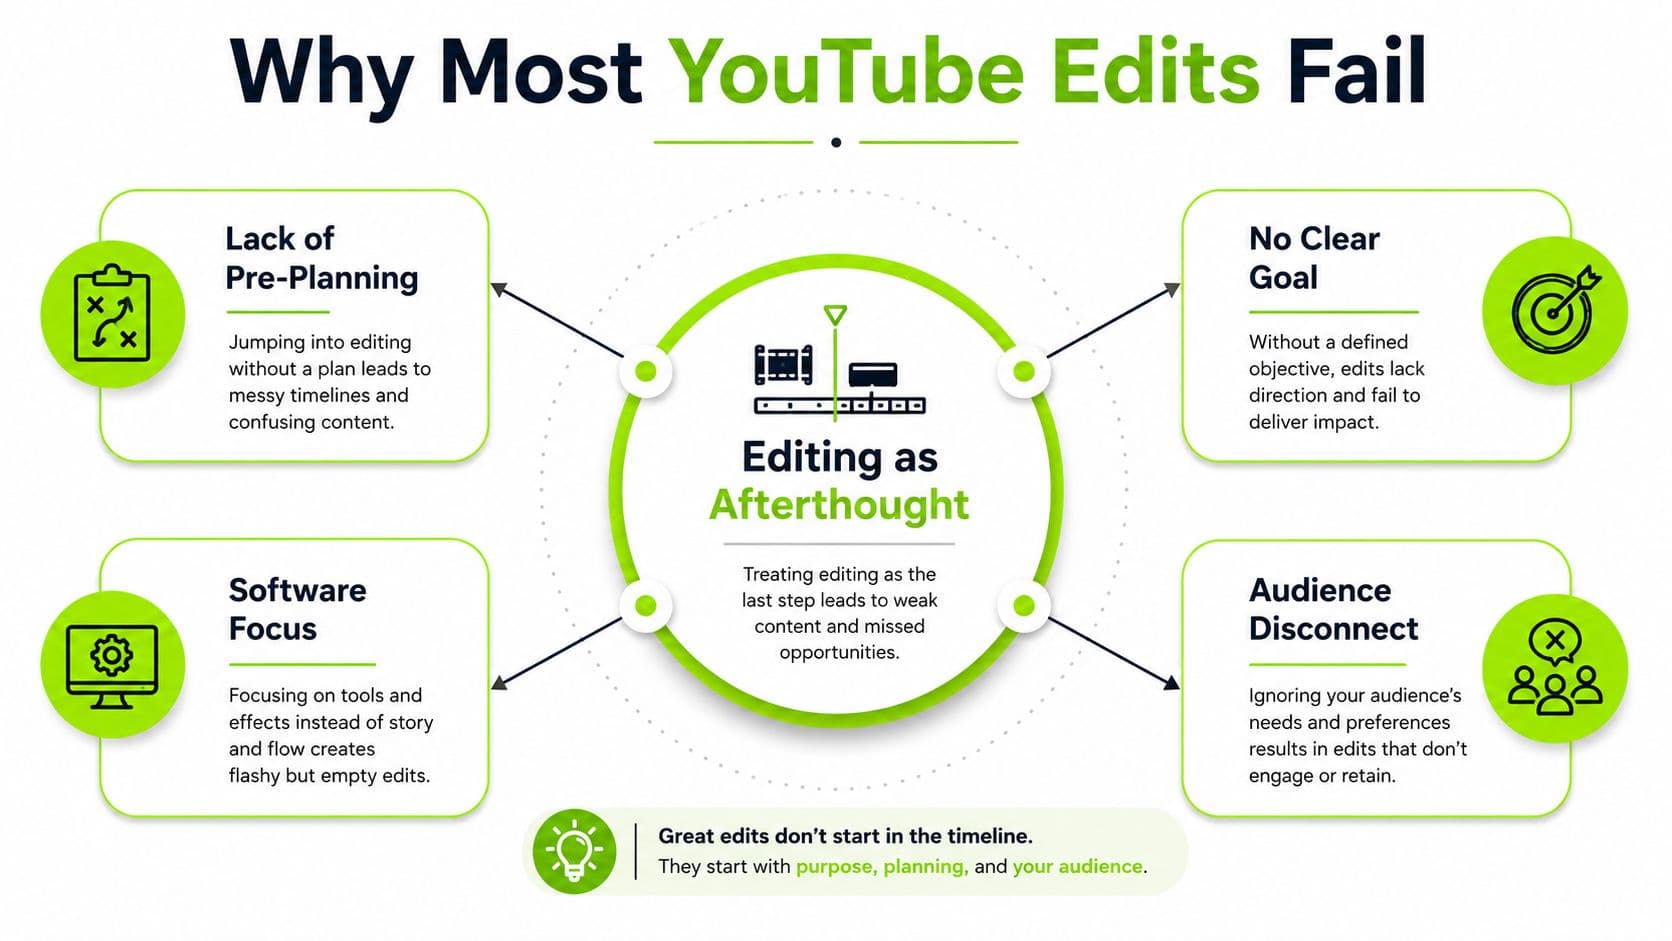
The biggest editing mistake happens before any clip hits the timeline. Creators often open software with no retention goal, no packaging idea, and no clear reason for the viewer to stay. That is why a video can look polished and still underperform. The edit was cosmetic, not strategic.
YouTube Studio gives you the map. Audience retention shows where viewers stop watching, average view duration tells you how long people stayed, CTR shows whether the packaging pulled the click, and watch time tells you how much total viewing the video earned. Once you treat those four signals as editing inputs, the job changes from making things clean to fixing the exact moments that lose people (YouTube analytics for editors).
Practical rule: if the thumbnail promises one thing and the first seconds say something else, the edit is already fighting the click.
The core failure mode is poor alignment
A weak hook does not always look weak in the timeline. It can be too much setup, the wrong tone, or a cold open that delays the payoff. Early drop-offs usually point to one of those problems, so the opening has to be checked against the title, the thumbnail, and the promise the viewer already accepted when they clicked.
This is also where analytics stop being abstract. If the first spike of drop-off lands right after the opening, the issue is rarely “the whole video.” It is usually a mismatch in tone, pacing, or expectation. When that happens, I look at the first 15 to 30 seconds first, because that is where the edit either confirms the promise or starts losing the room.
An editorial pass can still save a video after upload. YouTube Studio supports post-upload changes like Trim & Cut, so creators can fix obvious mistakes and remove unnecessary sections without rebuilding the whole file from scratch (YouTube Studio editing and statistics).
What I check first
I look for three things, in order. First, whether the opening matches the title and thumbnail. Second, whether the middle repeats itself. Third, whether the viewer gets a clear reason to keep watching after the first payoff.
The retention graph works well as a cut list. A sudden dip usually means the viewer hit confusion, drag, or mismatch, and the edit should answer that with a tighter hook, a cleaner handoff, or a shorter setup. If you want a shortcut-heavy workflow for reducing edit time, this internal breakdown on how to cut YouTube editing to 1 hour with an upstream workflow most creators miss is a useful companion.
The mindset shift is simple. Editing is not the polish layer, it is the retention layer. Once you stop treating it like an afterthought, the entire video gets sharper.
Building the Story Cut Before Anything Else
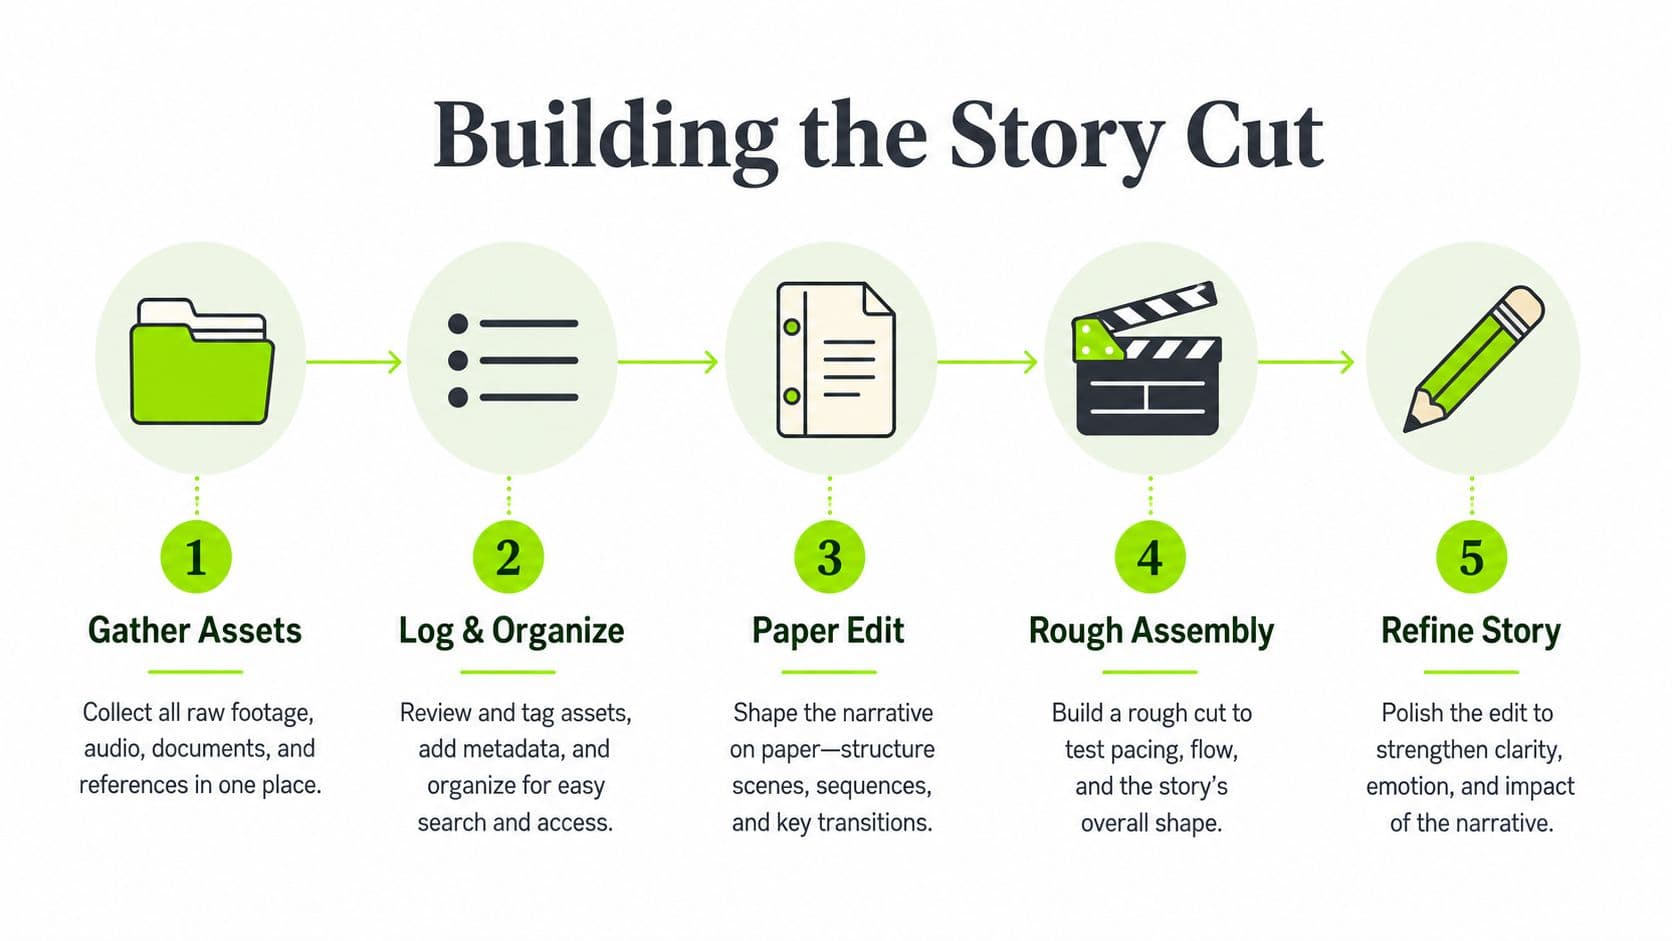
The cleanest edits start boring. I mean that as a compliment. Before any music, captions, or color, I want the story cut locked so the video already works in silence.
Gather, label, then assemble
The workflow is straightforward. Pull every usable file into one project, sort by camera angle or segment, and name things so you can find them later. On larger shoots, a shot list keeps you from digging through hours of footage for one needed line or reaction.
A simple folder structure beats chaos every time:
That structure sounds basic because it is basic. Basic systems are what keep you from wasting an afternoon on the wrong clip.
- 01 Footage: raw camera files, sorted by date or camera
- 02 Audio: lav tracks, room tone, music, and SFX
- 03 Graphics: logos, overlays, captions, and lower thirds
- 04 Selects: the best takes and highlights
- 05 Exports: drafts, review files, and final renders
Build the story cut before prettifying anything
The story cut is the version that only cares about structure. You remove mistakes, dead air, duplicate points, and anything that doesn't help the main idea move forward. YouTube's own guidance around planning openings and key moments fits this approach, and it also emphasizes pacing as a deliberate choice, faster cuts for intensity, slower timing for reflection (YouTube video editing guidance).
Lock the structure before you decorate it. If the story doesn't hold on its own, B-roll won't rescue it.
For scripted videos, a paper edit helps more than another round of “creative” trimming. I'll often map the script against the raw footage, then build the rough assembly from the strongest sentences first. If you need a script framework that keeps that process organized, this video scripts template is a practical reference point.
The goal is a rough cut that already feels watchable. Once that exists, every later decision gets easier, because the edit is serving the story instead of hiding its absence. When creators do it the other way around, adding graphics before structure, they usually burn time polishing scenes they end up removing anyway.
Pacing and Retention Tactics That Actually Move the Needle
Retention drops are usually a pacing problem before they are a creative problem. If viewers are only making it through about 50% to 60% of a video on average, every extra pause, repeated point, and slow transition has real cost (Mailchimp on YouTube editing). The job is not to cram more into less time, it is to keep each second carrying its weight.
Structural edits beat flashy edits
The edits that improve retention most often are the unglamorous ones. Cut repetition, remove dead air, and trim transitions that do not earn attention. If a point can land once, do not ask the viewer to hear it three times.
A few cuts usually do more for watch time than any visual flourish:
The retention graph helps you decide where those fixes belong. If viewers fall off during setup, the setup is too long. If they leave right after the payoff, the next point is taking too long to arrive. The graph is not decoration, it is a map of where attention breaks.
- J-cuts and L-cuts: let the audio lead or trail the picture so dialogue feels less chopped up.
- Punch-ins on cuts: change frame size to break visual sameness.
- B-roll over weak A-roll: cover flat moments with motion instead of relying on patience.
- Tighter first third: protect the early part of the video, where abandonment risk is highest (Mailchimp on YouTube editing).
Don't confuse motion with momentum
Flashy transitions feel active for a moment, then they start to slow the video down. A plain cut that moves the idea forward is usually better than a clever transition that makes the viewer wait.
Pace gets stronger when the edit changes texture on purpose. Wide shot, medium shot, close-up. Spoken line, supporting visual, back to talking head. That kind of alternation keeps the viewer engaged without turning the edit into noise.
A useful retention framework for choosing those adjustments is the guide on how to improve retention. Keep it open while you edit if you want a practical way to connect pacing choices to viewer behavior.
Read the dip, then fix the cause
Retention graphs are diagnostic tools. If viewers leave during setup, shorten the setup. If they drift during explanation, tighten the phrasing and add visual support. If they drop after a big promise, move the payoff closer to the promise.
That is work of how to edit YouTube videos for watch time. You are not just trimming footage, you are removing friction at the exact moments where attention starts to slip.
Audio Cleanup, Color, and Motion Without Losing Your Mind
Audio is the fastest way to make a video feel amateur, and it's also one of the easiest areas to fix without turning the project into a marathon. Clean dialogue, consistent levels, and restrained music do more for perceived quality than a pile of transitions ever will.
What are the common questions?
What is the short answer for How to Edit YouTube Videos: The Complete Creator Workflow?
Learn how to edit YouTube videos with a proven step-by-step workflow covering pacing, retention, audio, AI shortcuts, and repurposing for Shorts.
What should creators do first?
Audio levels: make sure dialogue stays clear and music never competes with speech.
Who is this guide for?
This guide is for YouTube creators, faceless channel operators, agencies, and teams using AI tools to improve video production and growth.
Action checklist
Apply this to your channel today.
- 1Audio levels: make sure dialogue stays clear and music never competes with speech.
- 2Caption accuracy: check for mangled names, product terms, and quoted lines.
- 3Thumbnail alignment: confirm the thumbnail promise matches the opening.
- 4Metadata completeness: title, description, tags, timestamps, and links should all be filled in.
- 5End-screen placement: make sure the last moments leave room for the next video.
Sources & methodology
- Satura editorial guide based on the source video, topic cluster, and article sections.
- Source video reviewed for this article: https://www.outrank.so/