What is the quick answer?
Master your AI setup with a complete creator workflow. Learn to configure editing, clipping, and analytics tools for faster, high-performing video production.
Key takeaways
- The AI Orchestration Gap in Creator Workflows
- Why more tools can slow production
- What orchestration looks like
- Configuring Your Central Production Hub
- Start with project rules
- Import with the next use in mind
Overview
Most advice about AI setup starts with a shopping list. Add a writing assistant, a video generator, a caption tool, an analytics dashboard, and perhaps an automation platform. Then creators wonder why production feels like air traffic control.
The problem usually isn't a lack of tools. It's the absence of a connected workflow. A scalable creator operation needs one repeatable path from idea and raw footage to edit, publishing, and performance feedback. That shift matters as AI becomes ordinary workplace infrastructure. Stanford HAI reports 88% organizational AI adoption, while 4 in 5 university students use generative AI, evidence that creators are entering a market where AI-assisted production is expected rather than novel (Stanford HAI's 2026 AI Index Report).
The AI Orchestration Gap in Creator Workflows
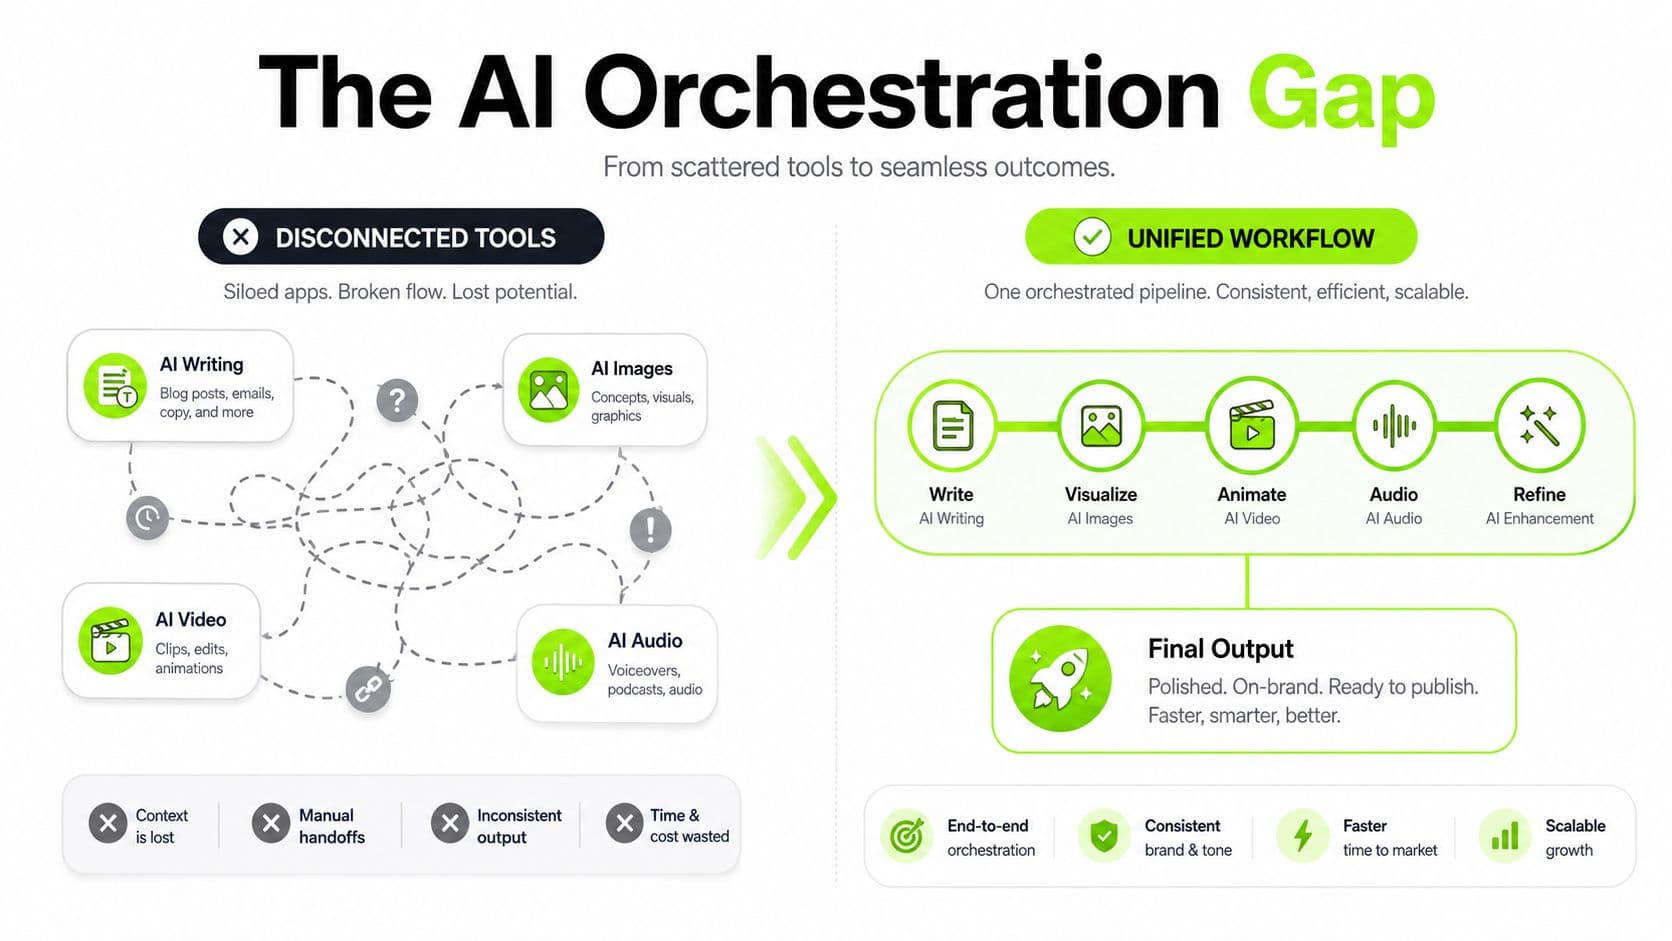
Most creators are already using generative AI, but many are using it as a collection of disconnected assistants. Independent reporting puts creator adoption at 86% to 87%, with 60% using more than one AI tool in the past three months (Artlist's creator workflow report). That sounds advanced until you inspect the handoffs. One tool writes a script, another generates images, a third creates audio, and a fourth stores analytics. The creator still moves files, rewrites prompts, renames exports, and decides what the retention graph means.
That isn't orchestration. It's tool switching with an AI label.
Why more tools can slow production
Every handoff creates a failure point. The script may use a different angle from the thumbnail. The voiceover may run longer than the visual sequence. A promising clip may be exported without captions, then uploaded to another platform where the aspect ratio or opening beat no longer works.
The creator pays for that friction in two ways:
PwC's discussion of AI agents makes the broader point that businesses still rarely connect agents across workflows and functions. For creators, the practical interpretation is simple: the value isn't in adding another isolated assistant. It's in connecting research, editing, packaging, publishing, and analysis so each output informs the next decision.
Practical rule: Use fewer handoffs, not merely more automation.
- Context switching: You leave the creative task to manage files, settings, or prompts.
- Broken feedback loops: Performance data stays separate from the production decisions that should respond to it.
- Duplicated work: The same transcript, footage, and audience insight get processed repeatedly.
- Inconsistent standards: Each tool applies different defaults for pacing, captions, audio, and exports.
What orchestration looks like
A proper setup treats the channel as a production system. A transcript becomes both a research index and a clipping map. A selected clip carries its intended platform, hook, voice style, caption treatment, and export preference. Analytics don't sit at the end as a report. They feed the next hook, opening sequence, and segment order.
That's why a single workspace can outperform a larger stack, even when individual tools are impressive. The question isn't “Which AI tool should I try?” It's “Where does this asset go next, and what information must travel with it?”
For a useful single-dashboard perspective, see the one-dashboard rule for faster YouTube automation. For brands that need publishing controls and approval safeguards, secure AI posting for brands is a useful reference point. The principle applies to channels too: automation should reduce repetitive work without removing review where mistakes can damage trust.
Configuring Your Central Production Hub
A central hub should make the next action obvious. For a browser-based creator workflow, that means your footage, project organization, edit settings, imports, and exports should live close together instead of being scattered across local folders and separate applications.
Satura AI is one option for this kind of setup. Its browser-based workspace supports raw uploads and imports from YouTube or TikTok links, while its editor handles timeline work, subtitles, voiceovers, effects, and exports without requiring a download-heavy desktop process.
Start with project rules
Create a consistent project structure before importing anything. A practical arrangement is:
The names matter less than consistency. If every project uses the same bins, you can open an old channel episode and understand its state without reconstructing the entire production history.
Set export preferences before the first edit. Keep separate defaults for long-form YouTube, vertical Shorts, TikTok, and Reels. The purpose isn't to lock yourself into one format. It's to prevent the final export from becoming a technical scramble after the creative work is finished.
- Source bin: Original footage, imported links, transcripts, and reference clips.
- Working bin: Selected moments, rough cuts, generated voiceovers, and visual assets.
- Packaging bin: Captions, thumbnails, titles, descriptions, and platform versions.
- Published bin: Final exports and the performance notes attached to each upload.
Import with the next use in mind
When you upload raw footage, preserve the original file and create working copies for edits. When you import from a YouTube or TikTok link, label the source with its channel, topic, and intended use. A file named clip-final-v3 tells you almost nothing. A label that identifies the source and hook gives the asset value later, especially when you search for related examples.
Use transcription early. A searchable transcript helps you locate statements, identify repeated ideas, and find sections that can become clips without replaying an entire recording. It also gives caption generation, voiceover planning, and idea analysis a shared source.
For broader asset-management principles, this guide to creative asset management is a useful companion. Template systems can help too, particularly when a team needs repeatable layouts and centralized references. Oviond's new template library offers context for organizing reusable creative structures rather than rebuilding every project from scratch.
Setup test: If importing, locating, editing, and exporting requires a different app each time, the hub isn't doing enough work.
Building a Four-Stage AI Production Pipeline
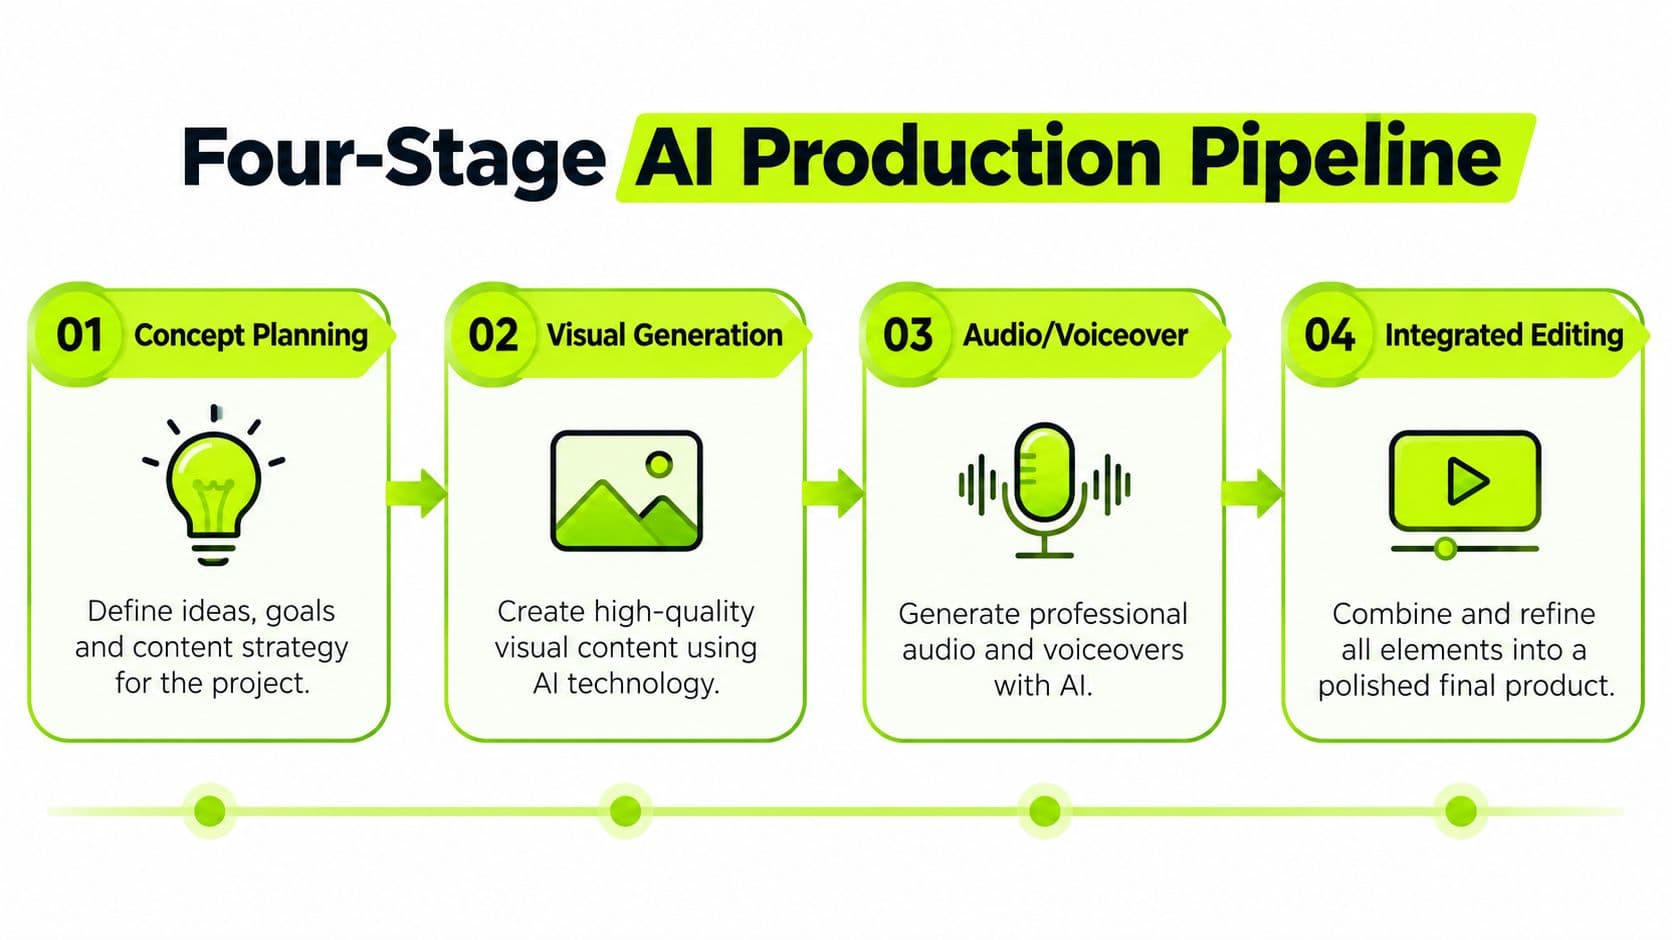
Short-form production improves when creators separate decisions instead of asking one tool to solve everything in a single prompt. A practical pipeline has four stages, concept planning, visual generation, audio and voiceover, and integrated editing. This structure lets you validate each asset before it reaches the final timeline.
Stage one, concept planning
Start with the viewer promise, not the visual style. Write the intended payoff, the audience problem, the opening line, and the evidence or story that supports it. For repurposed content, transcription comes first. Then tag moments by function, such as contradiction, reveal, demonstration, emotional beat, or practical answer.
This prevents a common automation mistake, choosing a visually attractive passage that has no narrative tension. A clip needs a reason to continue watching before it needs motion effects.
Stage two, visual generation
Generate only the visuals that support the spoken idea. A faceless channel can use AI-generated footage, screenshots, diagrams, stock material, or animated text, but every visual should clarify the sentence being delivered. Random image changes may create movement without creating meaning.
AutoClip and Clip Finder are useful at this stage because they help surface candidate moments from long-form material. Treat their suggestions as a shortlist, not a final verdict. Review the surrounding context, remove setup that doesn't earn attention, and preserve the line that creates the strongest open loop.
Stage three, audio and voiceover
Voiceover determines the edit's usable rhythm. Select a voice that fits the subject and write for speech rather than for the page. Short sentences, clear emphasis, and deliberate pauses give captions and visual changes room to work.
Speech enhancement can clean a rough recording, while AI voiceovers can fill gaps when a channel uses a consistent narrator. The trade-off is authenticity. A synthetic voice may improve production speed, but if its cadence sounds detached from the subject, viewers notice the mismatch. Use the voice as part of the channel identity, not as a disposable layer.
Stage four, integrated editing
Assemble the hook first, then the supporting sequence, then the payoff. Add captions after the spoken structure is stable, and use motion, sound effects, and background removal only where they reinforce comprehension.
Retention benchmarks give this stage a measurable target. A short-form guide places healthy Shorts retention roughly at 70% to 85%, while videos under five minutes often sit around 50% to 70%, and longer videos commonly range from 25% to 45%, depending on niche (the short-form retention research). Those are directional benchmarks, not promises. A clip that starts slowly won't be rescued by polished captions.
The same research-backed workflow emphasizes validating assets before final assembly. That matters because integrated editing should be the final coordination stage, not the place where you discover that the concept, voice, and footage disagree.
For a broader implementation model, this YouTube automation pipeline guide shows how the stages can fit into a repeatable production system.
What are the common questions?
What is the short answer for AI Setup for Creators: Build a Faster Video Workflow?
Master your AI setup with a complete creator workflow. Learn to configure editing, clipping, and analytics tools for faster, high-performing video production.
What should creators do first?
Packaging bin: Captions, thumbnails, titles, descriptions, and platform versions.
Who is this guide for?
This guide is for YouTube creators, faceless channel operators, agencies, and teams using AI tools to improve video production and growth.
Action checklist
Apply this to your channel today.
- 1Packaging bin: Captions, thumbnails, titles, descriptions, and platform versions.
- 2Published bin: Final exports and the performance notes attached to each upload.
- 3Does the hook create a clear information gap? The viewer should understand what they'll gain by continuing.
- 4Can the idea survive compression? If the central point disappears when the explanation gets shorter, it may be too broad for short-form.
- 5Does the source material contain a payoff? A strong opening without a satisfying conclusion produces curiosity without completion.
Sources & methodology
- Satura editorial guide based on the source video, topic cluster, and article sections.
- Source video reviewed for this article: https://www.outrank.so/