What is the quick answer?
Learn how to edit faster with a proven video editing workflow. Practical tips on rough cuts, AI tools, shortcuts, and templates that save real time.
Key takeaways
- The Real Reason Editing Takes So Long
- Separate the decisions
- Setting Up Your Project Before You Cut
- Make the project searchable
- Create a selects timeline
- The Three-Pass Editing Method
Overview
You've got a ten-minute vlog, a full memory card, and a deadline that keeps moving closer. The timeline is open, but you're choosing takes, trimming pauses, fixing audio, adding captions, and adjusting color in the same pass. Six hours later, the video is finished, but the process has left you too tired to publish the next one.
How to edit faster isn't mainly a question of finding a clever shortcut. It's a workflow design problem. The fastest editors separate decisions, automate repetitive work, and reserve human attention for story, tone, and timing.
The Real Reason Editing Takes So Long
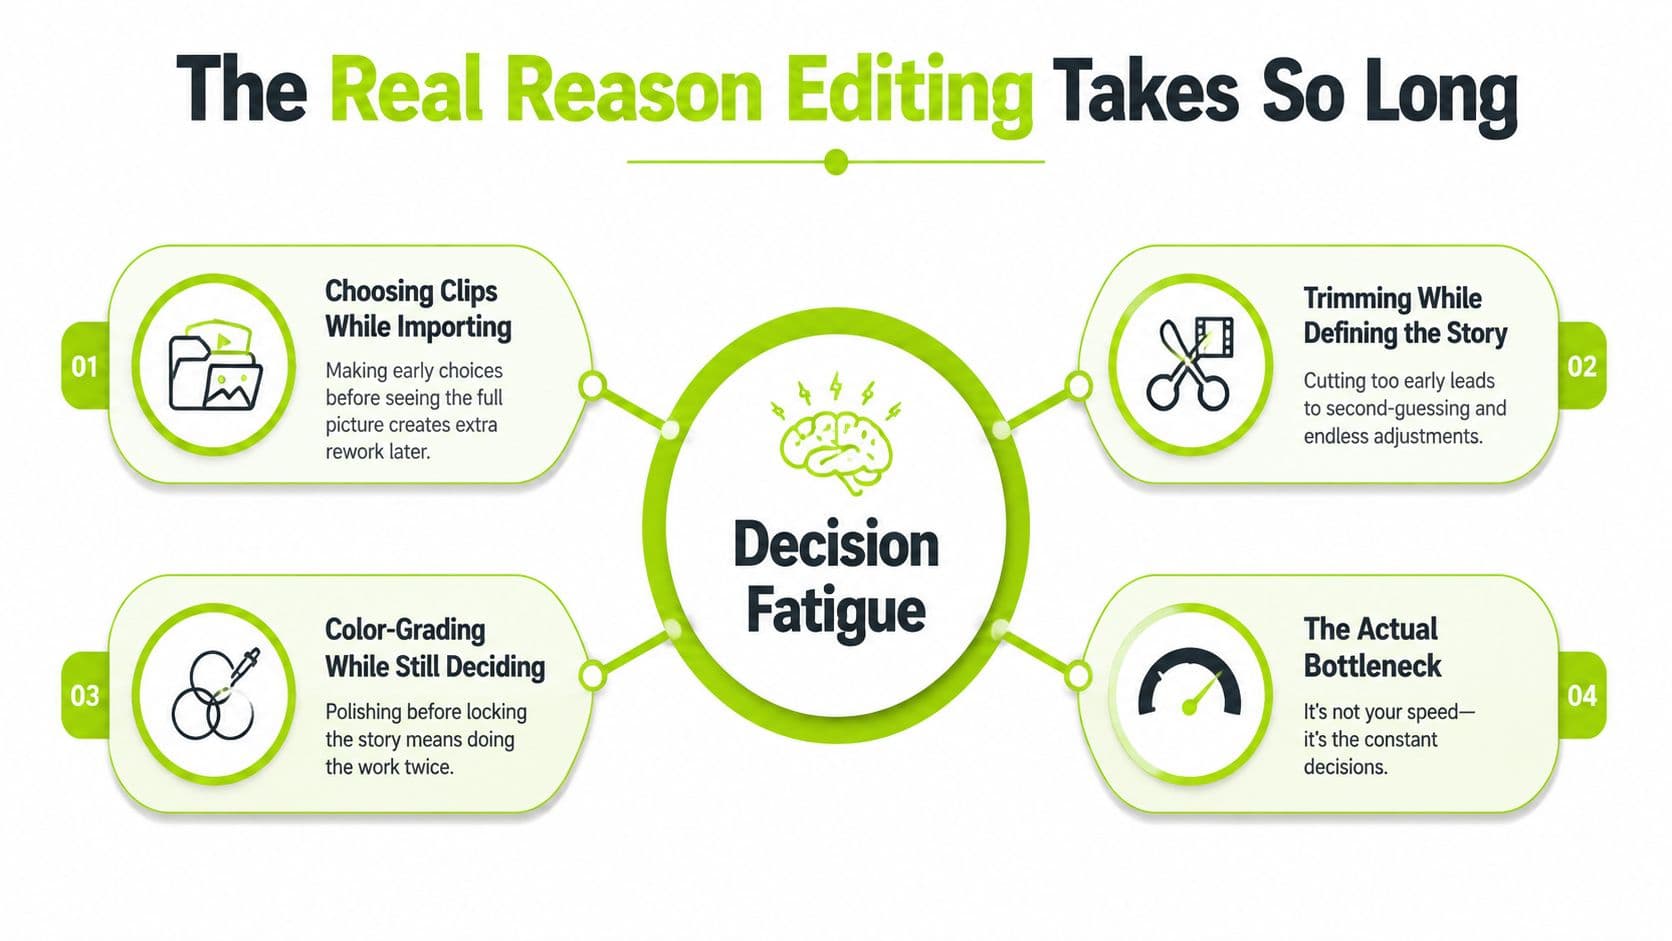
A creator can spend six hours on a ten-minute vlog without doing anything obviously wrong. The problem usually starts when three different decisions happen at once: content, structure, and polish.
Content decisions answer, “Which moments are worth keeping?” Structure decisions answer, “How should those moments flow?” Polish decisions cover audio, color, captions, graphics, and continuity. If you make all three while scrubbing through the same clip, every small choice interrupts the next one.
That's decision fatigue. You're importing footage and choosing takes, trimming while still discovering the story, then color-grading a shot before you know whether it belongs in the final cut. The timeline becomes a place for exploration, editing, and finishing all at once.
Separate the decisions
A cleaner workflow handles the layers in order:
One creator may spend six hours on a vlog by switching between these layers every few minutes. The same video can feel dramatically lighter when the editor makes a rough assembly first, shapes the narrative second, and polishes only after the structure holds together.
Practical rule: If you're making a detail decision before you've made the story decision, you're probably editing out of order.
This workflow-first mindset is also why this upstream workflow for cutting YouTube editing time matters. Preparation reduces the number of decisions you need to make inside the timeline, which is more valuable than memorizing another shortcut.
- Content: Find the usable footage and remove obvious dead weight.
- Structure: Build the story, sequence the ideas, and establish pacing.
- Polish: Finish sound, color, captions, graphics, and exports.
Setting Up Your Project Before You Cut
A fast edit starts with a project that answers basic questions immediately. You should know what a file is, where it belongs, which timeline is the rough assembly, and what playback settings keep the system responsive.
Make the project searchable
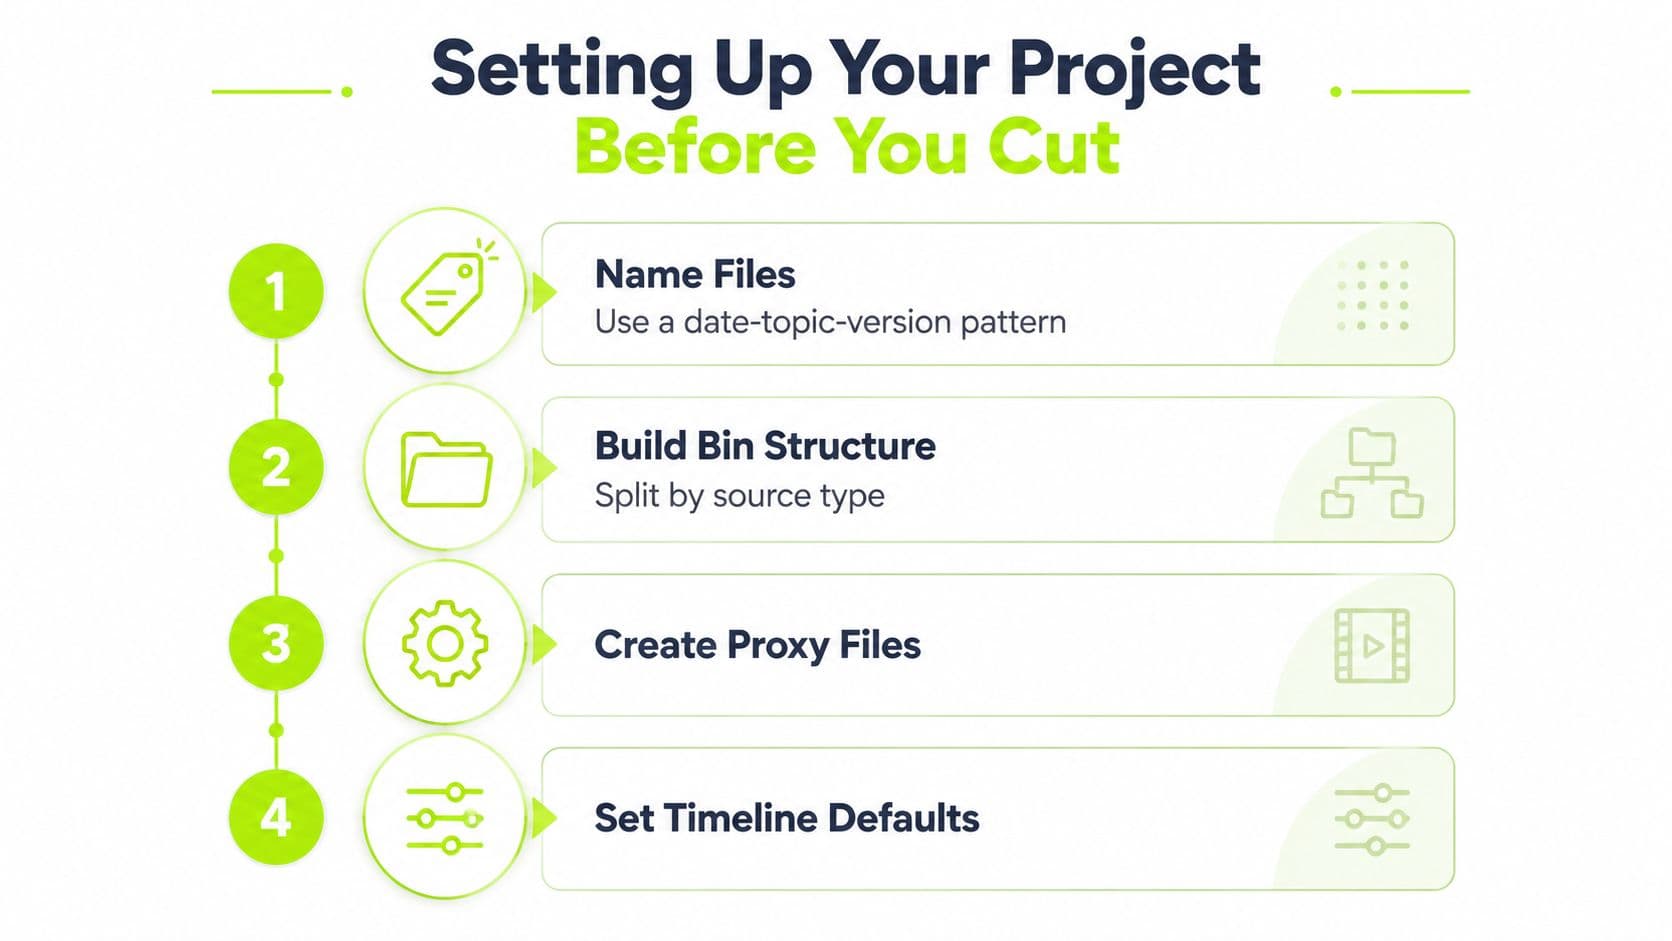
Use a consistent filename such as 2024-03-14_phone-review_v01. The date, topic, and version tell you more than a file called FINAL_final2.mp4 ever will. Version names also make feedback safer because you can distinguish a working export from a review copy.
Build bins by source type, not by scene. A practical structure might include camera footage, phone footage, screen recordings, music, sound effects, graphics, and exports. Scene-based bins often force you to decide where a clip belongs before you know how you'll use it. Source-based bins keep ingest simple and let the timeline handle the story.
For 4K or high-frame-rate footage, create proxies before serious trimming. Smooth scrubbing protects your concentration. A technically impressive setup that makes every playback stutter isn't organized, it's expensive friction.
Create a selects timeline
Start a separate rough-assembly timeline before opening the main cut. Drag in every clip that looks usable, then trim aggressively to the strongest material, roughly the top 40 percent of what you reviewed. Duplicate that timeline and use the duplicate as the foundation for the edit.
The prep steps that consistently pay off are clear naming, source-based bins, proxies for demanding footage, and a selects timeline. Elaborate color labels, nested folders for every tiny variation, and decorative organizational systems often look professional without changing the actual decisions you make.
Ingest footage into Satura AI early if you're using its smart clips and transcripts. Having those assets ready before the rough cut starts can prevent a later pause while you wait for analysis or captions.
A clear file and timeline system also makes the broader AI setup workflow easier to apply without turning your project into a collection of disconnected experiments.
The Three-Pass Editing Method
The three-pass method works because it limits the type of decision you're allowed to make at each stage. One workflow guide recommends an assembly pass at 1x speed, a fine-cut pass at 2–3x speed, and a final polish pass at 1x speed. It also reports that the rough material can reach the timeline in about 20% of total edit time, while mastering 10 keyboard shortcuts alongside the method can save 30–40% of total editing time. The workflow guide documents the method and its common failure points.
For practical planning, divide the edit into 30% structure, 40% refinement, and 30% polish. Those allocations aren't a law, but they give you a useful ceiling. If polish consumes most of the schedule, the earlier passes probably left too many unresolved problems.
A worked example
For a twelve-minute talking-head video, set a cap of 90 minutes for the structural pass, 2 hours for refinement, and 90 minutes for polish. That's a total of under five hours. An unstructured edit can often take twice as long because the editor repeatedly revisits choices already made.
| Pass | Focus | Target Time | Unstructured Edit (Typical) |
|---|---|---|---|
| Pass one | Assembly, order, rough trims | 90 minutes | Decisions keep changing |
| Pass two | Pacing, dead space, dialogue, audio levels | 2 hours | Refinement overlaps with assembly |
| Pass three | Color, graphics, captions, final mix | 90 minutes | Polish begins before structure is locked |
During pass one, place clips in order and ignore color, detailed sound design, and caption styling. During pass two, tighten cuts, remove dead space, fix dialogue clarity, and lock the rhythm. During pass three, finish the visual treatment, graphics, captions, audio mix, and export preparation.
The classic speed killer is mixing passes. If you start color-grading while the rough cut is still changing, you'll polish shots that may disappear and create extra work every time the edit moves.
For technical finishing, a focused final cut pro scopes tutorial can help you make scope checks part of the polish pass instead of stopping the structural edit to troubleshoot exposure.
Where AI Actually Saves Time in the Edit
AI earns its place when it handles repetitive work with clear rules. It shouldn't decide the emotional center of a scene, the joke's exact timing, or whether a quiet pause carries meaning. Those choices still belong to the editor.
Research on automated video editing reports several useful benchmarks. Moving from manual timeline editing to a review-and-direct model can reduce editing time to roughly one-fifth while increasing output by 3–5x, with a manual workflow taking 8–12 hours for 3–5 clips and an AI-assisted workflow producing 10–15 clips in 1–2 hours. The same research reports 70–85% savings for clip extraction, 95–98% reductions in captioning time, and 60–80% savings in repurposing workflows. The creator workflow research provides the underlying benchmarks.
Automate the repeatable layer
| Editing Task | Manual Time | With Satura AI | Time Saved |
|---|---|---|---|
| Finding short clips in long footage | Slow review and marking | Highlight detection creates candidates | Often substantial |
| Captions and filler-word cleanup | Transcribe, align, and revise manually | Transcript-based captions and cleanup | Often substantial |
| Reframing 16:9 into 9:16 | Reposition each shot | Subject tracking and automated reframing | Often substantial |
| Basic polish | Manual denoise and color matching | One-pass cleanup for review | Useful, with checking |
For long takes, highlight detection can surface potential hooks quickly. Review every candidate for context, misinterpreted emphasis, and whether the opening makes sense without the full conversation. A technically strong clip with no setup is still a weak short.
Captions are another high-impact task. A speech-to-text comparison reported Deepgram Nova-3 at about 504.4x processing speed, compared with 34.0x for ElevenLabs Scribe v2, so the fastest system can process an hour of audio in seconds while the other takes roughly two minutes. The speech-to-text benchmark also summarizes subtitle guidance around 160–180 words per minute, 2 lines, 20 characters per second, and 42 characters per line. Treat those as readability checks, not automatic approval.
Reframing is useful when the subject stays trackable, but walking out of frame, overlapping people, or rapid movement can break the result. Color matching and denoise can remove routine cleanup, yet over-smoothed skin and flattened texture still require manual correction.
Delegate repetitive, judgment-light work. Keep your hands on anything that defines the narrative beat or the video's feel.
Use AI tools for video editing as a way to compare your options, then build a review step into every automated task. Adobe's creator data also suggests that AI adoption is concentrated in post-production, while 56% of creators report saving only 30+ minutes per video and 10% report saving more than four hours. Adobe's creator overview reinforces the practical point: automation helps, but only when you target the right bottleneck.
Shortcuts, Templates, and Reusable Setups
Shortcuts matter after the workflow is clean. They reduce hand movement and menu hunting, but they won't rescue a project where the story is still undefined.
Start with the commands you use in nearly every edit:
Learn these in context rather than trying to memorize an enormous shortcut chart. A shortcut earns its place when it removes a repeated interruption, not because it looks impressive in a tutorial.
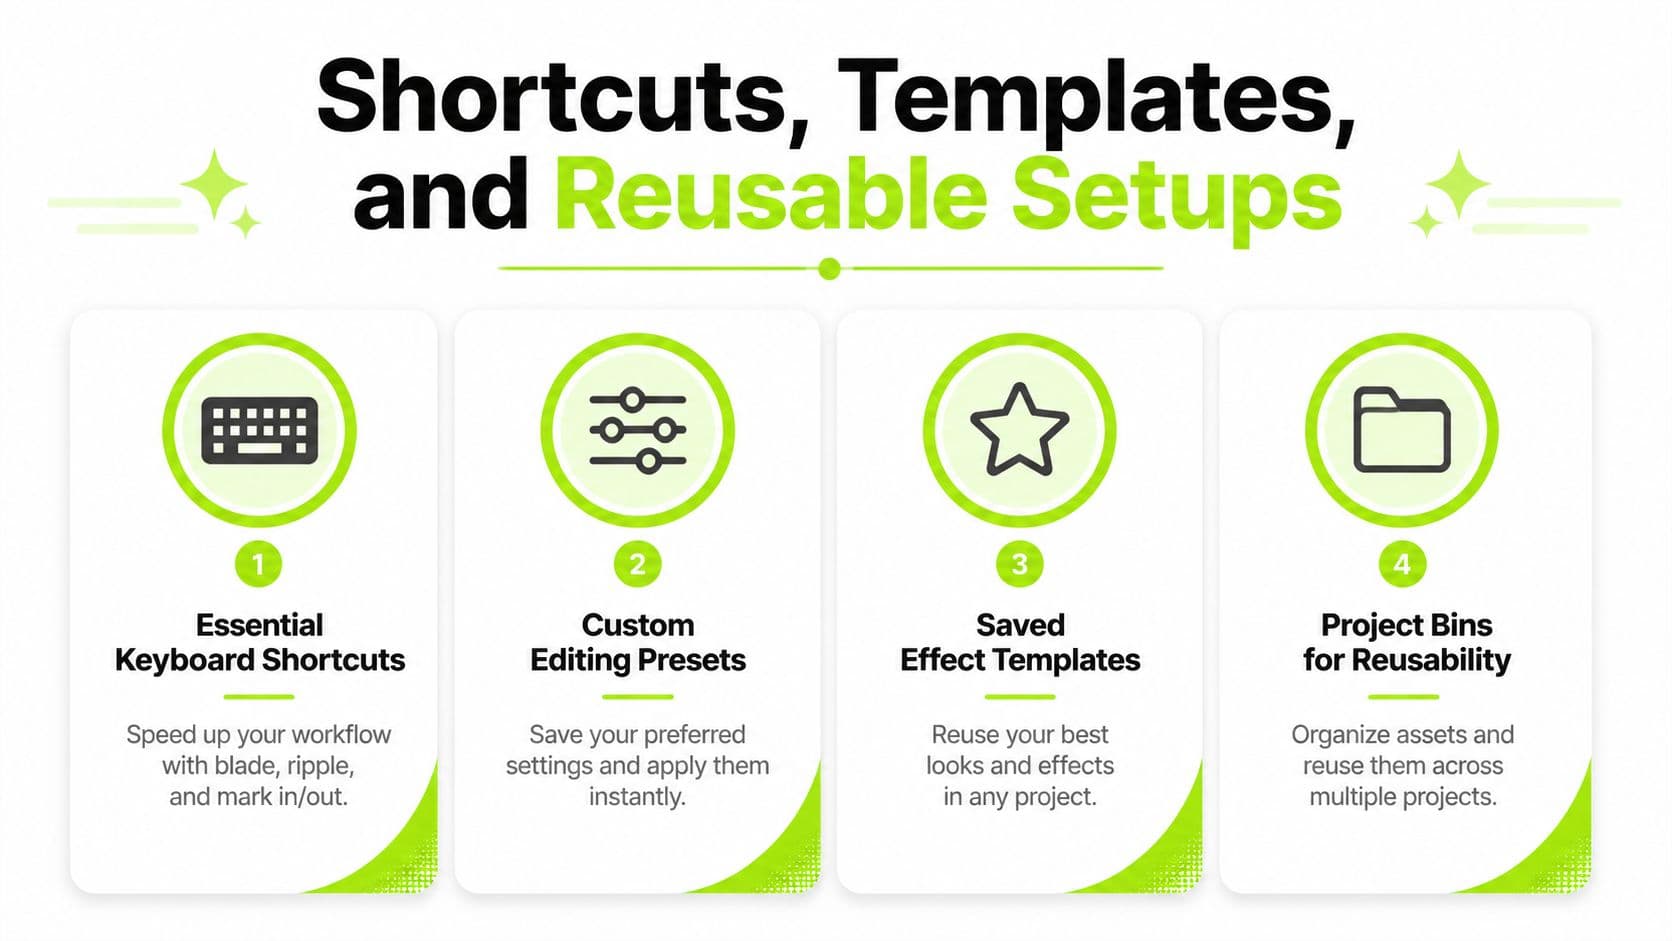
- Blade: Split clips without reaching for the toolbar.
- Ripple delete: Remove a section and close the gap immediately.
- Markers: Flag moments, notes, pickup ideas, or review issues.
- In and out selection: Define a range before inserting or extracting.
- Multicam switch: Change angles while playback continues.
- Preset application: Use a two-key sequence to apply a saved preset to a selected clip or group.
Build once, reuse everywhere
Create project templates for recurring formats. Include bins for your usual sources, timeline defaults, intro and outro spaces, lower-third placeholders, caption styling, and export destinations. Save separate export presets for YouTube, Shorts, Reels, TikTok, and podcast clips so delivery doesn't become another round of manual setup.
Your reusable stack can include:
The best template is modest. If it contains too many assumptions, you'll spend longer disabling elements than building the project from scratch. A good template gives you structure while leaving the story open.
Save one finished project in Satura as the default template, including the bin layout, timeline settings, caption treatment, and export configuration. Your next video can start with the repetitive decisions already made. If publishing is also a bottleneck, Post To All Social Media At Once offers a useful companion workflow for distributing finished versions without recreating the same publishing task on every platform.
For broader asset organization, use a repeatable system rather than scattering music, graphics, and thumbnails across unrelated folders. A structured creative asset management workflow keeps reusable material findable when the deadline is tight.
- Color LUTs: Keep a small set of dependable starting looks.
- Audio buses: Route dialogue, music, and effects consistently.
- Motion graphics: Save lower thirds, title cards, and calls to action as editable presets.
- Timeline sections: Prebuild recurring openings, closings, and end screens.
What are the common questions?
Do shortcuts replace creative judgment?
No. Shortcuts remove interface friction, but you still decide what belongs in the story, where a cut should land, and whether a moment feels honest.
Which tasks need manual control?
Keep manual control over narrative order, emotional timing, comedic pauses, important names, nuanced audio choices, and any AI result that changes the meaning of a shot.
How should I measure time savings?
Log rough-cut, fine-cut, polish, and export time separately for two weeks, then compare similar videos with your previous workflow. Include time spent correcting automated output, because an apparent shortcut isn't useful if review takes longer than the original task.
What is the short answer for How to Edit Faster: A Practical Workflow for Creators?
Learn how to edit faster with a proven video editing workflow. Practical tips on rough cuts, AI tools, shortcuts, and templates that save real time.
What should creators do first?
Ingest media: Bring footage into the project and confirm files are available.
Who is this guide for?
This guide is for YouTube creators, faceless channel operators, agencies, and teams using AI tools to improve video production and growth.
Action checklist
Apply this to your channel today.
- 1Ingest media: Bring footage into the project and confirm files are available.
- 2Name files: Use a date-topic-version pattern.
- 3Choose a template: Load the recurring bins, timelines, presets, and export settings.
- 4Verify bins: Separate camera footage, audio, graphics, music, and exports.
- 5Build selects: Create a rough timeline and remove weak material.
- 6Pass one: Assemble the structure without polishing.
Sources & methodology
- Satura editorial guide based on the source video, topic cluster, and article sections.
- Source video reviewed for this article: https://www.outrank.so/