What is the quick answer?
Learn how to convert MKV to MP3 using VLC, FFmpeg, and online tools. Perfect for creators repurposing video audio for podcasts, voiceovers, and clips.
Key takeaways
- Why MKV to MP3 Is Really an Audio Extraction Task
- Demuxing versus transcoding
- Extracting Audio with VLC Media Player
- The steps that actually work
- Using FFmpeg for Precise Audio Control
- Two commands, two different jobs
Overview
You've got an MKV on your desktop, a clip on your phone, or a lecture recording from a client, and you only want the audio. Maybe it's the soundtrack, maybe it's a podcast intro, maybe it's the spoken part of a screencast you're repurposing for short-form content. The fastest win isn't “converting video to audio” in some abstract sense, it's knowing when to extract, when to re-encode, and which tool won't waste your time.
Why MKV to MP3 Is Really an Audio Extraction Task
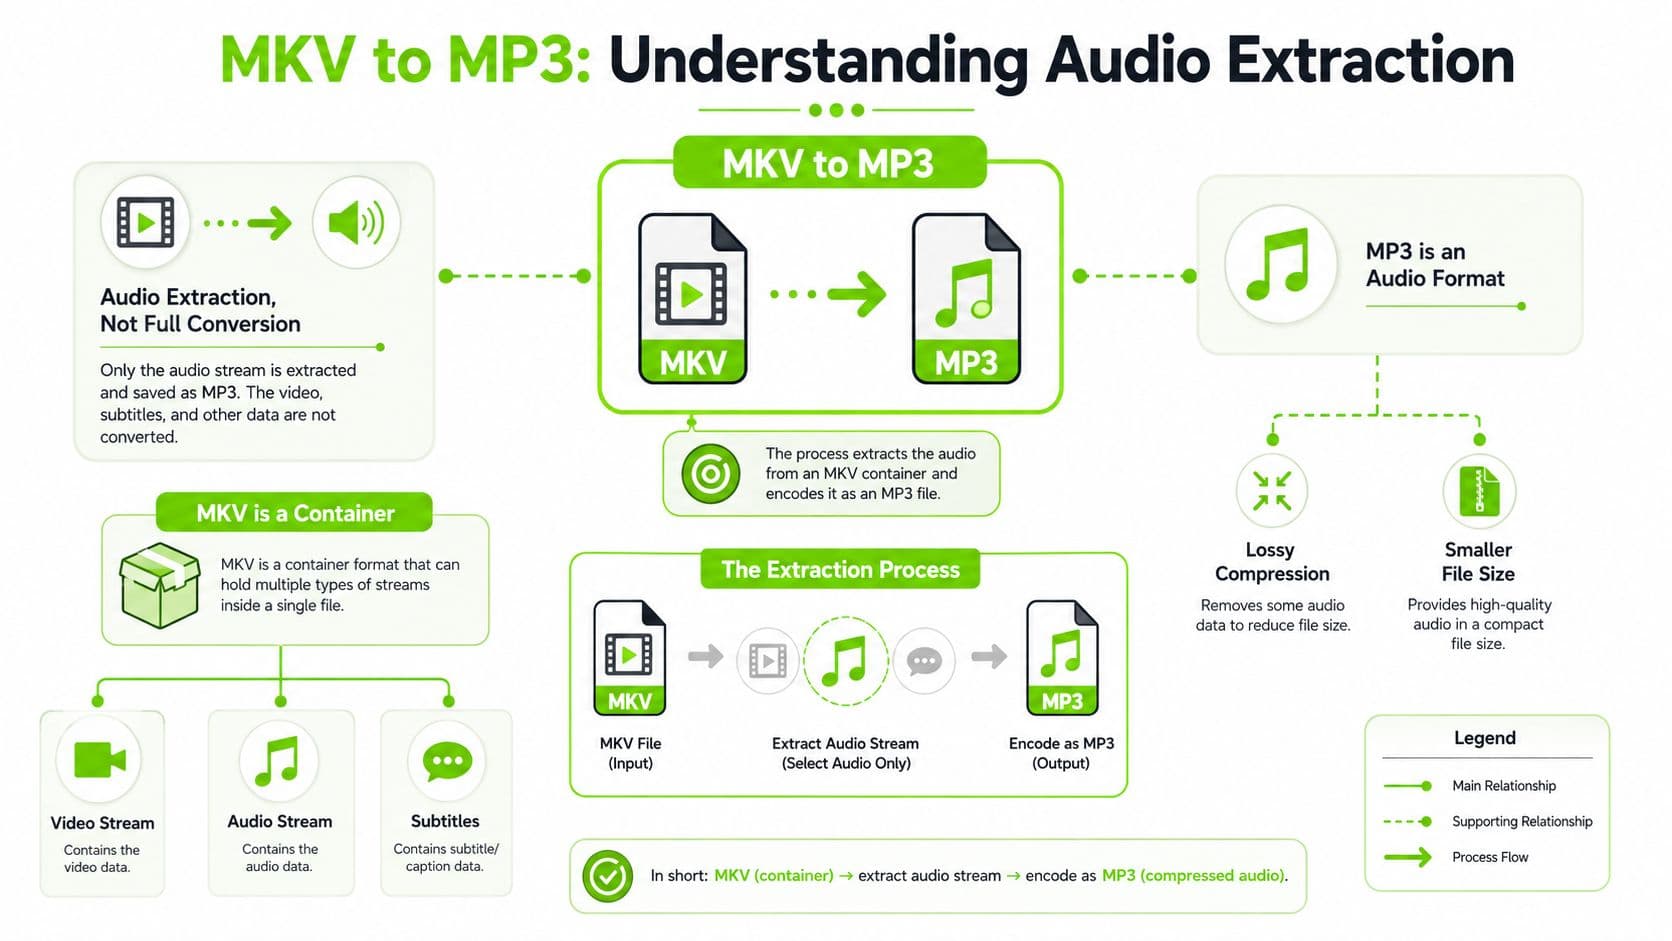
When a creator says, “I just need the audio from this MKV,” the job is usually straightforward. MKV is a container, not a single audio format, so it can hold video, audio, and subtitles as separate streams. In practice, converting MKV to MP3 means selecting the right audio track, then exporting it as MP3. Tools that handle this well usually describe it as a simple extract, convert, download flow, because that matches how editors and repurposing teams work under deadline. A quick overview from HowToAudio treats the task the same way, while mp3.to explains the audio-extraction workflow from a browser-first angle.
Practical rule: if you only need voice or music, start by treating it as audio extraction, not full media conversion.
For creators repurposing podcasts, clips, or multilingual assets, that distinction matters. If the source MKV includes commentary, a dub, or alternate language tracks, the right output depends on which stream you choose before you export.
Demuxing versus transcoding
Two words matter here. Demuxing means separating streams out of the container, while transcoding means changing the codec itself. If the MKV already contains an MP3 audio stream, you may be able to pass it through without re-encoding, which keeps quality intact and saves time. If the file stores AAC, Opus, or AC-3 audio, the job becomes a real transcode to MP3.
That is why some tools feel fast and others take longer. A browser converter can strip the audio track and write a fresh MP3 with very little setup, while a command-line tool like FFmpeg gives tighter control when the source needs careful handling. If your end goal is to download YouTube subtitles for localization, the same principle applies, you are pulling one specific asset out of a larger media package instead of converting everything at once.
A clean mental model saves time in production. If the source is already MP3, extraction can be quick and lossless. If it is not, you are asking the encoder to remake the audio for wider compatibility, and that is a different trade-off entirely.
Extracting Audio with VLC Media Player
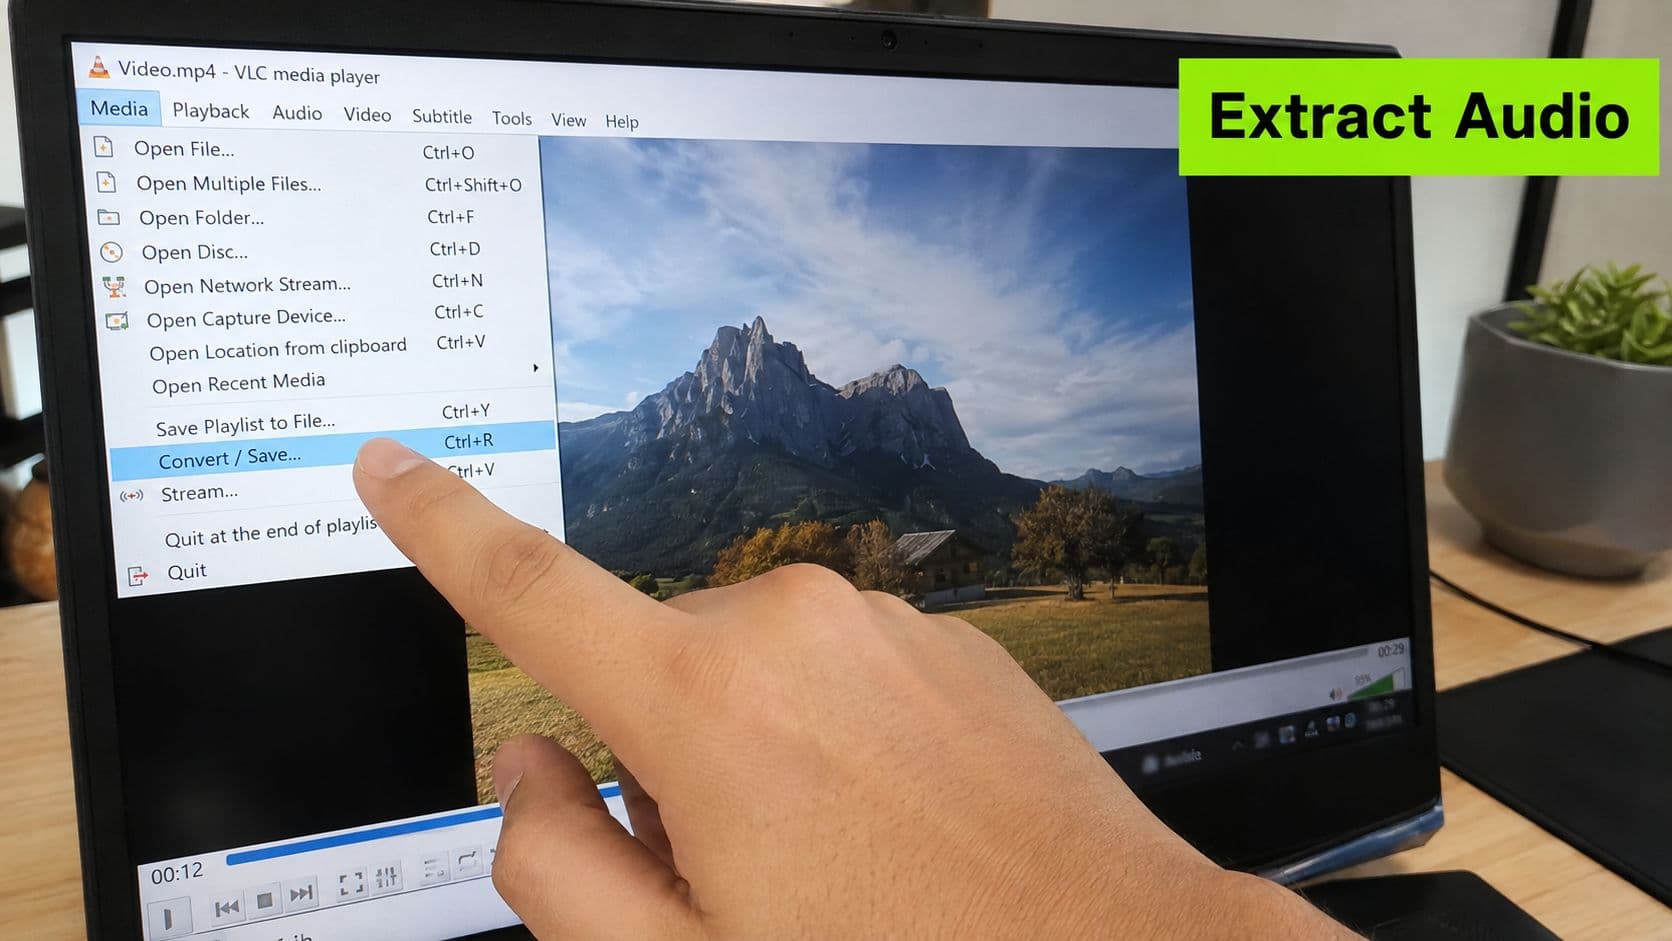
VLC is the lazy genius option, and I mean that in the nicest possible way. It's already sitting on a lot of creator machines, which makes it the quickest no-new-download path when someone drops an MKV into your lap and asks for an MP3 before lunch. The route is simple on Windows, Media > Convert/Save, and on macOS, File > Convert / Stream. The key is not just opening the file, but choosing the right profile and output name so VLC doesn't hand you a weird file masquerading as audio.
The steps that actually work
Start by adding the MKV, then pick the Audio - MP3 profile. In the profile settings, make sure MP3 is selected as the output format, because VLC's menus can make it feel like you've chosen audio while still leaving you in a generic profile. If the file has multiple audio tracks, choose the right one before you start, especially when the MKV includes commentary, alternate language tracks, or a dubbed version.
Don't trust the default track. MKV files often carry more than one audio stream, and VLC will happily convert the wrong one if you don't check.
The filename matters too. If you forget the .mp3 extension, you can end up with a file that doesn't behave like an MP3 at all. That's the sort of small mistake that makes a quick task turn into a weird troubleshooting session. For a creator workflow, VLC is best when you need one clean export and want to stay inside a familiar player. For a deeper pass on audio removal workflows, the guide on removing audio from video pairs well with this approach.
A good VLC export is boring in the best way. You click, it writes the file, and you move on.
Using FFmpeg for Precise Audio Control
FFmpeg is the tool I reach for when the export needs to be exact. It lets you inspect the MKV first, then decide whether to copy the audio stream or re-encode it, and that choice matters because passthrough is only safe when the source is already MP3. If the track is another codec, force the audio settings yourself instead of hoping the file will behave. A practical creator workflow uses ffmpeg -i video.mkv -acodec copy audio.mp3 for a true MP3 stream, and ffmpeg -i video.mkv -b:a 192K -vn audio.mp3 when the source needs re-encoding and the video has to be dropped. Tipard's FFmpeg guidance covers the codec check and bitrate approach.
Two commands, two different jobs
On Windows, this works cleanly in Command Prompt or PowerShell. On macOS and Linux, the same logic works in Terminal.
The -vn flag removes video, while -b:a sets the audio bitrate. For dialogue-heavy clips, that gives you enough control to keep speech clear without wasting space. For music or performance footage, I usually step up the bitrate rather than accepting a bare minimum export, because that extra headroom matters once the file gets reused across edits.
When I'm batching creator assets, the command line also makes it easier to keep filenames and folders organized. That matters if you are repurposing episodes, clipping webinar pulls, or assembling a podcast library from mixed sources. For a related workflow on joining video files before extraction, see how to join MP4 files. A separate Windows workflow also points to recursive folder processing and higher-fidelity batch settings, which is why FFmpeg holds up better than most GUI converters once the job scales. The Windows bulk workflow notes recursive conversion and higher-fidelity batch settings.
- Passthrough when the source is already MP3:
ffmpeg -i video.mkv -acodec copy audio.mp3 - Transcode non-MP3 audio to MP3:
ffmpeg -i video.mkv -b:a 192K -vn audio.mp3
When FFmpeg is the safer default
GUI tools can hide settings behind a profile picker or an advanced menu. FFmpeg makes the audio-only decision obvious. If the MKV contains multiple tracks, you can also choose the exact one instead of trusting the default track selection. That matters when you are pulling narration from a webinar, a guest track from an interview, or music from a performance clip.
Best habit: inspect the source codec first, then decide whether you are copying audio or encoding it.
If you edit or repurpose clips for a content pipeline, FFmpeg gives you the consistency batch work needs. It is plain, but it keeps libraries predictable and saves time once the same extraction pattern repeats across hundreds of files.
Online Converters and Browser-Based Tools
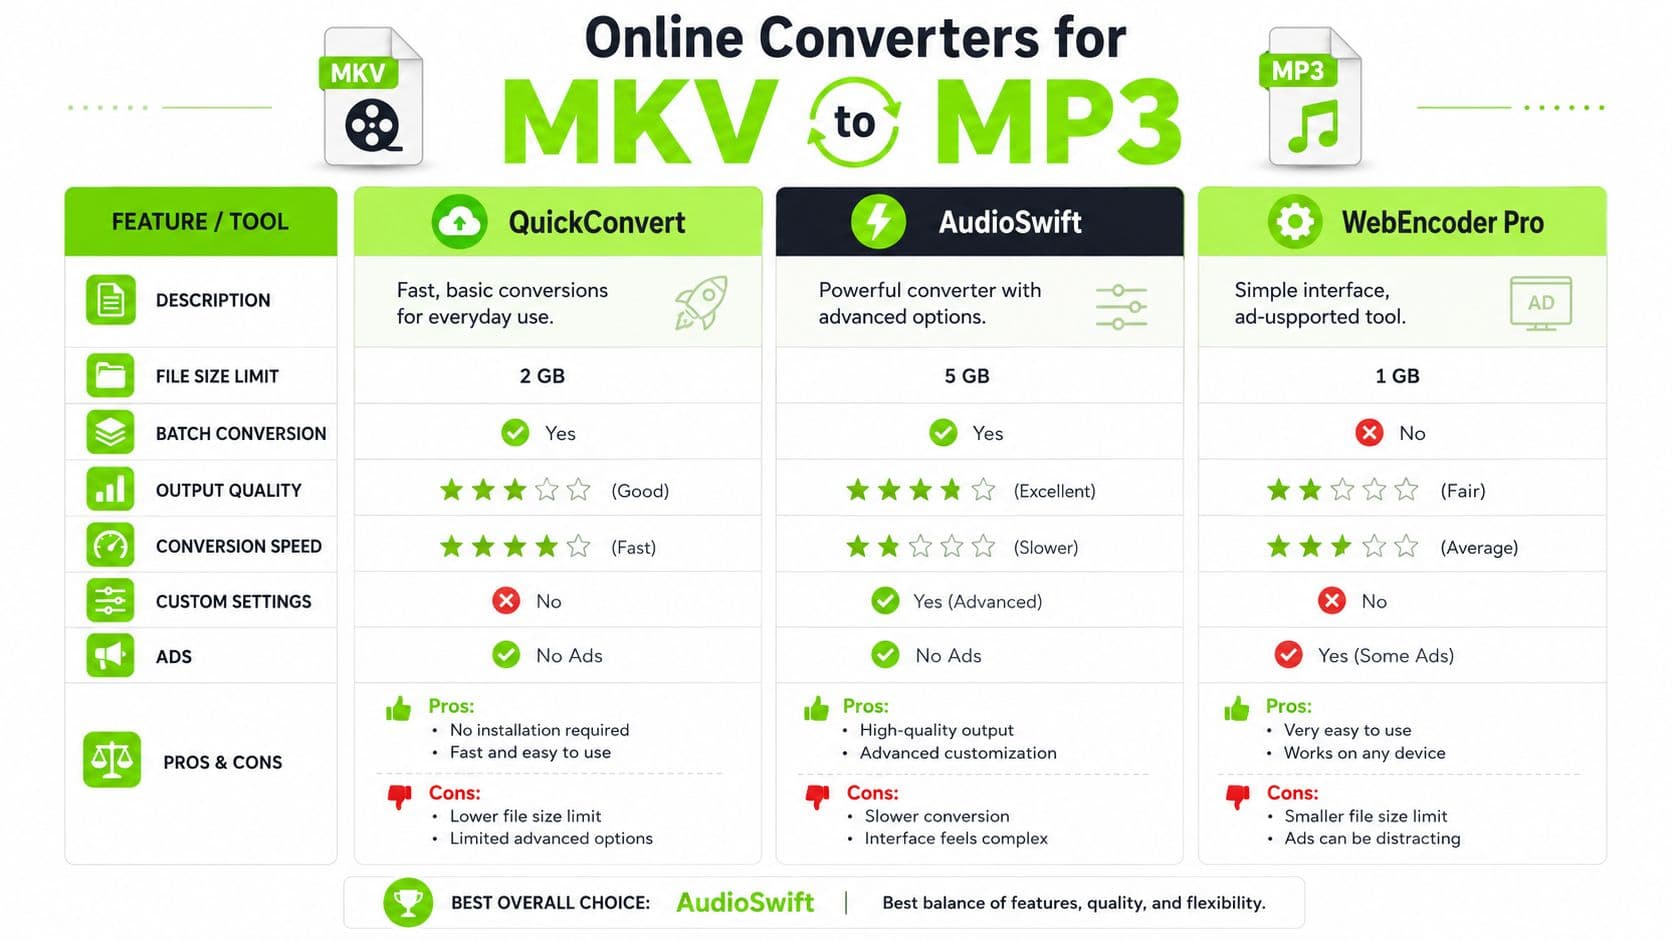
A browser converter makes sense when you have one MKV to strip and you do not want to install anything. The workflow is simple, upload the file, choose MP3, and download the result. These tools have also settled into a similar pattern across the market, with services advertising free conversion, broad format coverage, and cloud inputs like computer, Google Drive, Dropbox, and direct URL uploads. Convertio explicitly advertises more than 200 formats, while other services in the space advertise +47 formats and immediate download without software installation, which shows how commoditized this workflow has become online. Convertio's MKV to MP3 page and a broader converter overview reflect that browser-first model.
What browser tools are good at
They are fast for small files. They work well for creators who are traveling, using a borrowed machine, or stuck on a locked-down laptop. They also fit jobs where the source is not sensitive and you only need a clean MP3 for a rough cut, a quick podcast pull, or a reference track.
Where they stop being the smart choice
They are a weaker fit for private material, long recordings, or anything you would rather not upload. Public-facing converter pages focus on function, not audited usage counts, so the strongest evidence is the feature set itself, multilingual interfaces, zero-install workflow, and broad source support. If the task involves sensitive content, a local method is still the safer route. If it is a longer file or a production archive, browser tools can become awkward fast.
Output control is the other limit. Some sites let you adjust bitrate or channels, others keep the settings basic. When you need fine-grained control, desktop tools usually win. For a related browser-first workflow that starts from a media link, the guide on converting video link to video fits the same online-first approach.
Online converters are handy, but they belong in the toolbox, not at the center of a serious repurposing pipeline.
Choosing the Right Bitrate for Your Content
Bitrate is where creators either waste space or leave quality on the table. The right choice depends on what's inside the MKV, because spoken-word content and music-heavy audio don't need the same treatment. One conversion guide recommends 320 kbps for music-heavy sources like scores or concerts, while 128 kbps is described as enough for dialogue and lectures. EchoWave's MKV to MP3 guide makes that trade-off explicit, and it's exactly the kind of choice that changes both file size and how polished the final file feels.
What are the common questions?
What is the short answer for Convert MKV to MP3: The Fastest Methods for Creators?
Learn how to convert MKV to MP3 using VLC, FFmpeg, and online tools. Perfect for creators repurposing video audio for podcasts, voiceovers, and clips.
What should creators do first?
Name files predictably: avoid accidental overwrites and make later editing easier.
Who is this guide for?
This guide is for YouTube creators, faceless channel operators, agencies, and teams using AI tools to improve video production and growth.
Action checklist
Apply this to your channel today.
- 1Name files predictably: avoid accidental overwrites and make later editing easier.
- 2Lossless audio: keep the original if the source quality matters.
- 3Archival use: preserve the source integrity instead of collapsing it into MP3.
- 4Multi-track files: MP3 handles one audio result, but your MKV may carry several tracks.
- 5Video still matters: if the file is meant for playback, extraction is the wrong move.
Sources & methodology
- Satura editorial guide based on the source video, topic cluster, and article sections.
- Source video reviewed for this article: https://www.outrank.so/